Today we're having dinner with my brother's.
My contribution is red-cooked (or red-braised) spare ribs.
Red cooking is basically braising meats in a soy sauce based liquid. The soy sauce colors the meat which gives the meat it's "red" color.
Typical recipes call for fresh soy sauce (light soy sauce - not to be confused with the light, low sodium soy sauces) and aged soy sauce (dark soy sauce). The aged soy sauce is what provides a majority of the coloring.
This recipe is adapted from Fuchsia Dunlop's, "Revolutionary Chinese Cookbook."
What caught my eye with this recipe is the use of caramelized sugar instead of aged soy sauce.
Braising Liquid Ingredients
1 slab Pork Spare Ribs (about 2 to 3 lbs)
2 T Brown Sugar
2 T Oil
Ginger (about 5 to 6 quarter size slices)
1/4 t ground cinnamon (or 1 stick)
1 Star Anise
1 Green Onion
1 Clove Garlic
Water or Broth (enough to almost cover the ribs)
The rest is on YouTube.
Enjoy! :-)
Saturday, December 25, 2010
Wednesday, December 22, 2010
December 22, 2010: Winter Solstice Tong Yuan
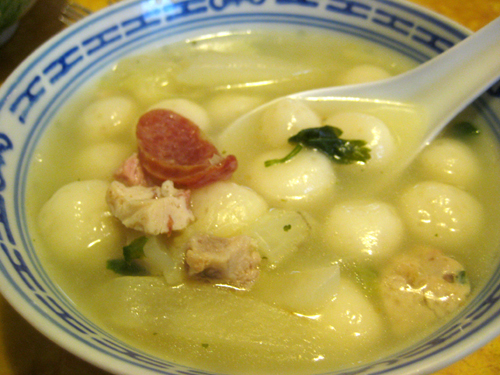
Yuan (or Tong Yuan which is similar to Mochi) is a glutinous rice flour "dumpling" soup we ate during the Winter Solstice.
I remember asking my dad why we ate this soup. His answer was "Yuan represented snowballs that occurred during the Winter."
As I grew older, I asked myself, "They lived along the coast in Guangdong, China. It snowed in the Tropics???"
Wikipedia's explanation is the round dumplings represent togetherness and family unity.
Togetherness and family unity. Isn't that's why we all gather around the dinner table?
I digress. Back to the soup...
The soft, chewy dumplings are served in a rich savory broth.
Basic Recipe
1 lb Glutinous Rice Flour
1/4 lb Tapioca Pearls (Soaked overnight, at a minimum, and drained)
1/2 t Salt
Water to form a soft dough (about 1 cup, but add water slowly as you knead).
The key to making the little round dumplings is to keep them small, about 1/2 inch in diameter. Too large... you end up with a large bland, chewy mochi ball.
Also, the tapioca pearls help reduce the chewiness. (A family secret... lol!)
The YouTube Video...
Tuesday, December 14, 2010
December 14, 2010: Daring Cooks Poaching
Jenn and Jill have challenged The Daring Cooks to learn to perfect the technique of poaching an egg. They chose Eggs Benedict recipe from Alton Brown, Oeufs en Meurette from Cooking with Wine by Anne Willan, and Homemade Sundried Tomato & Pine Nut Seitan Sausages (poached) courtesy of Trudy of Veggie num num.
For this month, Jenn and Jill decided to focus on a technique that seems intimidating to many, but with a little practice it’s really not that hard at all – poaching. All poaching means is cooking something in simmering (not boiling) water. And what more perfect way to practice the skill of poaching than learning how to poach an egg? They can make a tasty breakfast, or salad accompaniment; there are so many different ways to use poached eggs, and they are used in cuisines from a variety of cultures.
The 1st recipe is one of the most well known poached egg dishes: eggs benedict – an open sandwich of English muffin, Canadian bacon, poached egg, and hollandaise sauce. This rich and decadent dish can be served as a really nice breakfast or brunch for having company over, and is sure to impress! The “daring” with this dish is in successfully poaching an egg in water, as well as making one of the famed mother sauces of France, the hollandaise.
Our 2nd recipe, oeufs en meurette (eggs in meurette sauce), is a classic dish from the region of Bourgogne (Burgundy) in France. It involves poaching an egg in a red wine/stock, which will then turn into a fabulous reduction sauce. One serves the poached egg on top of fried croûtes with sauce, bacon, mushrooms and pearl onions. This is also a great dish for breakfast/brunch as well.
[Eat4Fun - For this challenge I'm making Hollandaise sauce and Bacon Eggs Benedict Deluxe. The deluxing is in the form of tomatoes, mushrooms and sauteed spinach.
Also, I've taken a whole new approach to documenting my results. I'm going video!]
Mandatory Items: To use the technique of poaching an egg.
Recipe Sources:
Hollandaise sauce by Alton Brown
[It's been a long time since I've made Hollandaise. The last time I ended up with mayonnaise. I didn't know about the trick of adding hot water to thin it out the mayonnaise thick sauce.]
Eggs Benedict
[To be exact, Bacon Eggs Benedict Deluxe]
Ingredients
4 eggs (size is your choice)
2 English muffins*
4 slices of Canadian bacon/back bacon (or plain bacon if you prefer)
Chives, for garnish
Splash of vinegar (for poaching) [I used 2 T vinegar per quart of water.]
For the hollandaise (makes 1.5 cups):
3 large egg yolks
1 tsp. (5 ml) water
¼ tsp. (1 ¼ ml/1½ g) sugar
12 Tbl. (170 g/6 oz.) unsalted butter, chilled and cut in small pieces [Used salted butter]
½ tsp. (2 ½ ml/3 g) kosher salt [Since I used salted butter, additional salt was not needed.]
2 tsp. (10 ml) freshly squeezed lemon juice
Pinch cayenne pepper (optional)
Directions:
Hollandaise Sauce
1. Fill a medium saucepan halfway with water and bring to a simmer.
2. Cut the chilled butter into small pieces and set aside.
3. Whisk egg yolks and 1 tsp. (5 ml) water in a mixing bowl large enough to sit on the saucepan without touching the water (or in top portion of a double boiler). Whisk for 1–2 minutes, until egg yolks lighten. Add the sugar and whisk 30 seconds more.
4. Place bowl on saucepan over simmering water and whisk steadily 3–5 minutes (it only took about 3 for me) until the yolks thicken to coat the back of a spoon.
5. Remove from heat (but let the water continue to simmer) and whisk in the butter, 1 piece at a time. Move the bowl to the pan again as needed to melt the butter, making sure to whisk constantly.
6. Once all the butter is incorporated, remove from heat and whisk in the salt, lemon juice, and cayenne pepper (if using).
7. Keep the hollandaise warm while you poach your eggs in a thermos, carafe, or bowl that you’ve preheated with warm water.
Poaching eggs -
8. If the water simmering in your pan has gotten too low, add enough so that you have 2–3 inches of water and bring back to a simmer.
9. Add salt and a splash of vinegar (any kind will do). I added about a tablespoon of vinegar to my small saucepan (about 3 cups of water/720 ml of water), but you may need more if you’re using a larger pan with more water. [I used 2 T of vinegar for every quart of water.]
10. Crack eggs directly into the very gently simmering water (or crack first into a bowl and gently drop into the water), making sure they’re separated. Cook for 3 minutes for a viscous but still runny yolk.
11. While waiting for the eggs, quickly fry the Canadian/back bacon and toast your English muffin.
12. Top each half of English muffin with a piece of bacon. Remove the eggs with a slotted spoon, draining well, and place on top of the bacon. Top with hollandaise and chopped chives, and enjoy!
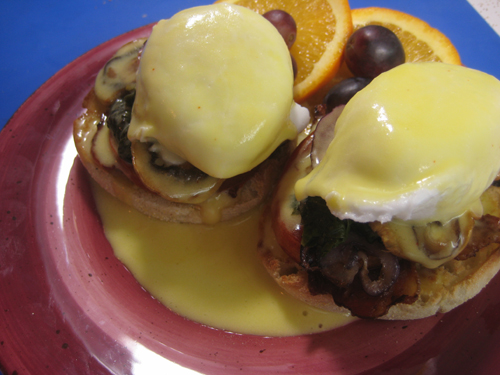
Bacon Eggs Benedict with tomato, mushroom and sauteed spinach.
Although the egg yolks turned out medium, cooked solid but still golden, the egg whites were very tender, almost melt in your mouth tender. That's the advantage of poaching.
Poaching slowly cooks protein at low heat so the protein molecules bind together loosely, which means tender.
For this month, Jenn and Jill decided to focus on a technique that seems intimidating to many, but with a little practice it’s really not that hard at all – poaching. All poaching means is cooking something in simmering (not boiling) water. And what more perfect way to practice the skill of poaching than learning how to poach an egg? They can make a tasty breakfast, or salad accompaniment; there are so many different ways to use poached eggs, and they are used in cuisines from a variety of cultures.
The 1st recipe is one of the most well known poached egg dishes: eggs benedict – an open sandwich of English muffin, Canadian bacon, poached egg, and hollandaise sauce. This rich and decadent dish can be served as a really nice breakfast or brunch for having company over, and is sure to impress! The “daring” with this dish is in successfully poaching an egg in water, as well as making one of the famed mother sauces of France, the hollandaise.
Our 2nd recipe, oeufs en meurette (eggs in meurette sauce), is a classic dish from the region of Bourgogne (Burgundy) in France. It involves poaching an egg in a red wine/stock, which will then turn into a fabulous reduction sauce. One serves the poached egg on top of fried croûtes with sauce, bacon, mushrooms and pearl onions. This is also a great dish for breakfast/brunch as well.
[Eat4Fun - For this challenge I'm making Hollandaise sauce and Bacon Eggs Benedict Deluxe. The deluxing is in the form of tomatoes, mushrooms and sauteed spinach.
Also, I've taken a whole new approach to documenting my results. I'm going video!]
Mandatory Items: To use the technique of poaching an egg.
Recipe Sources:
Hollandaise sauce by Alton Brown
[It's been a long time since I've made Hollandaise. The last time I ended up with mayonnaise. I didn't know about the trick of adding hot water to thin it out the mayonnaise thick sauce.]
Eggs Benedict
[To be exact, Bacon Eggs Benedict Deluxe]
Ingredients
4 eggs (size is your choice)
2 English muffins*
4 slices of Canadian bacon/back bacon (or plain bacon if you prefer)
Chives, for garnish
Splash of vinegar (for poaching) [I used 2 T vinegar per quart of water.]
For the hollandaise (makes 1.5 cups):
3 large egg yolks
1 tsp. (5 ml) water
¼ tsp. (1 ¼ ml/1½ g) sugar
12 Tbl. (170 g/6 oz.) unsalted butter, chilled and cut in small pieces [Used salted butter]
½ tsp. (2 ½ ml/3 g) kosher salt [Since I used salted butter, additional salt was not needed.]
2 tsp. (10 ml) freshly squeezed lemon juice
Pinch cayenne pepper (optional)
Directions:
Hollandaise Sauce
1. Fill a medium saucepan halfway with water and bring to a simmer.
2. Cut the chilled butter into small pieces and set aside.
3. Whisk egg yolks and 1 tsp. (5 ml) water in a mixing bowl large enough to sit on the saucepan without touching the water (or in top portion of a double boiler). Whisk for 1–2 minutes, until egg yolks lighten. Add the sugar and whisk 30 seconds more.
4. Place bowl on saucepan over simmering water and whisk steadily 3–5 minutes (it only took about 3 for me) until the yolks thicken to coat the back of a spoon.
5. Remove from heat (but let the water continue to simmer) and whisk in the butter, 1 piece at a time. Move the bowl to the pan again as needed to melt the butter, making sure to whisk constantly.
6. Once all the butter is incorporated, remove from heat and whisk in the salt, lemon juice, and cayenne pepper (if using).
7. Keep the hollandaise warm while you poach your eggs in a thermos, carafe, or bowl that you’ve preheated with warm water.
Poaching eggs -
8. If the water simmering in your pan has gotten too low, add enough so that you have 2–3 inches of water and bring back to a simmer.
9. Add salt and a splash of vinegar (any kind will do). I added about a tablespoon of vinegar to my small saucepan (about 3 cups of water/720 ml of water), but you may need more if you’re using a larger pan with more water. [I used 2 T of vinegar for every quart of water.]
10. Crack eggs directly into the very gently simmering water (or crack first into a bowl and gently drop into the water), making sure they’re separated. Cook for 3 minutes for a viscous but still runny yolk.
11. While waiting for the eggs, quickly fry the Canadian/back bacon and toast your English muffin.
12. Top each half of English muffin with a piece of bacon. Remove the eggs with a slotted spoon, draining well, and place on top of the bacon. Top with hollandaise and chopped chives, and enjoy!
Bacon Eggs Benedict with tomato, mushroom and sauteed spinach.
Although the egg yolks turned out medium, cooked solid but still golden, the egg whites were very tender, almost melt in your mouth tender. That's the advantage of poaching.
Poaching slowly cooks protein at low heat so the protein molecules bind together loosely, which means tender.
Sunday, November 14, 2010
Nov 14, 2010: Daring Cooks Souffle
Dave and Linda from Monkeyshines in the Kitchen chose Soufflés as our November 2010 Daring Cooks’ Challenge! Dave and Linda provided two of their own delicious recipes plus a sinfully decadent chocolate soufflé recipe adapted from Gordon Ramsay’s recipe found at the BBC Good Food website.
There are basically two parts to a soufflé recipe: the base and the egg whites. For savory soufflés, the base is usually a thick roux-based sauce made of butter, flour and milk or stock – to which you add the flavoring ingredients and the egg yolks. Sweet soufflés are based on a crème patisserie, or thick custard. The egg whites are beaten separately so that they incorporate lots of air bubbles; then the egg whites are folded into the base and the mixture spooned into a soufflé dish. After baking in the oven, the soufflé will magically rise. However, be warned that what goes up must come down: even a perfect soufflé will start to ‘deflate’ once you remove it from the oven - so be sure to serve it (or photograph it!) as soon as possible. In fact, Dave and Linda think the photographic aspect of this project may turn out to be more difficult than the culinary part.
[Eat4fun: I've always wanted to give a go at making a souffle. Here's my chance.
I'm typically a savory kind of guy, but this time around I choose the chocolate souffle.]
Chocolate Souffle
Adapted From BBC Good Food Recipe by Gordon Ramsay
Ingredients
FOR THE DISHES
2 Tbsp (30 ml) 1 oz (30g) unsalted butter, for greasing
Cocoa powder or finely grated chocolate
FOR THE CREME PATISSERIE
2 tbsp (30 ml) (18 gm) (2/3 oz) plain (all-purpose) flour
2 tsp (10 gm) (0.35 oz) caster (superfine) sugar (regular sugar is OK)
½ tsp (4½ gm) (0.15 oz) corn starch (aka cornflour)
1 medium egg yolk
1 medium whole egg
4 Tbsp (60 ml) milk
5 Tbsp (75 ml) heavy cream (or double cream)
3 oz (90gm) good-quality dark chocolate preferably 70+% cocoa solids, broken in pieces
2 Tbsp (30 ml) (15 gm) (½ oz) unsweetened cocoa powder
Optional: 2 tsp orange zest or 2 tsp minced chipotle chile en adobo or 1 tsp chipotle chile powder. (The chile version is a Monkeyshines favorite!) Optional: powdered sugar for dusting
FOR THE EGG WHITES
6 medium egg whites
6½ Tbsp (95 ml) 3 oz (90g) superfine/caster sugar (if you don’t have it, regular sugar is OK)
Directions:
1. Heat oven to moderate 375 ˚F/190 ˚C/gas mark 5.
2. Take four 1 cup/~240ml soufflé dishes and brush them completely with softened butter. Tip a little cocoa powder or grated chocolate into each dish, roll the dish around tilting it as you do so it is evenly lined all round.
[Instead of four 1 C ramekins, I used a larger 2 quart Pyrex dish.]

3. For the crème patisserie, mix the flour, sugar and corn starch into a small bowl. Put egg yolk and whole egg into a medium sized bowl, beat lightly, then beat in half of the flour mixture to give a smooth paste. Tip in the rest of the flour mixture and cocoa powder and mix well.
[The egg yolk mixture is pretty straightforward.]

[Amazing how the cocoa powder will mix in to form this very dark high viscosity liquid.]
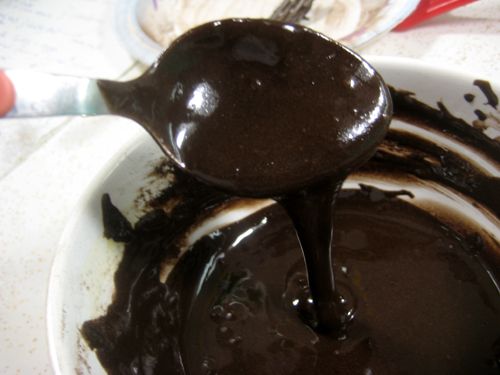
4. To make the ganache, pour the milk and cream into a pan and bring just to the boil. Remove from the heat. Add the chocolate and beat until it is melted and smooth with no lumps.
[Whoa! This ganache is very watery, not like any ganache I've made in the past. Hopefully, the thick egg yolk mixture will compensate for the watery ganache.]
5. Gradually stir hot chocolate ganache into the paste from step 3, and add the orange zest or chile if using. This is your crème patisserie.
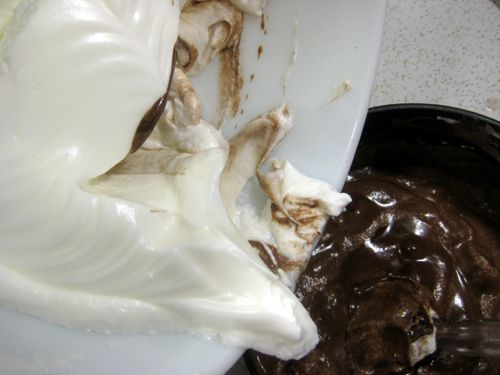
6. Whisk the egg whites to soft peaks with an electric whisk. Sprinkle in the sugar as you are mixing. Keep whisking to give stiff, firm peaks to give volume to the soufflés.
[Stiff Peaks. You must have patience with whipping egg whites to stiff peaks. It takes about 5 to 10 minutes so don't give up.]

7. Stir about 2 tbsp (30 ml) of the beaten egg whites into the crème patisserie. Carefully fold in a third of the rest, cutting through the mixture. Fold in another third (take
care not to lose the volume), then fold in the rest.
[Stirred in what was on the beaters plus a little more to lighten up the patisserie.]

[Adding the egg whites 1/3rd at a time.]
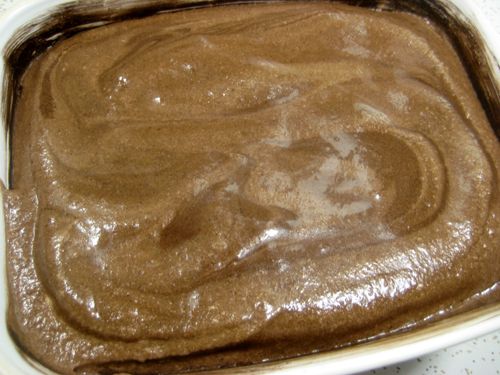
8. Spoon the mixture into the dishes. Run a spoon across the top of each dish so the mixture is completely flat. Take a little time to wipe any splashes off the outside of each dish, or they will burn on while cooking.
[Another trick is to wipe the edge of the dish so the mixture forms a little trench between the dish and the mixture. This is supposed to help the souffle rise in the center.]
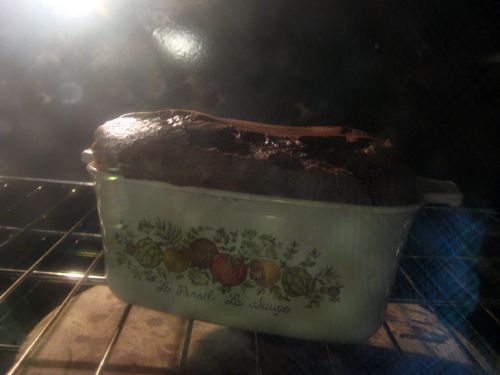
9. Bake the soufflés for 15-17 minutes. [For a larger dish, I baked about 20 minutes and used a skewer to check for doneness. The skewer should come out clean. I ended up cooking for 30 minutes, but probably could have pulled the souffle out at 25.]
[The next three photos show the rising during cooking.
Just into the 350F oven.]
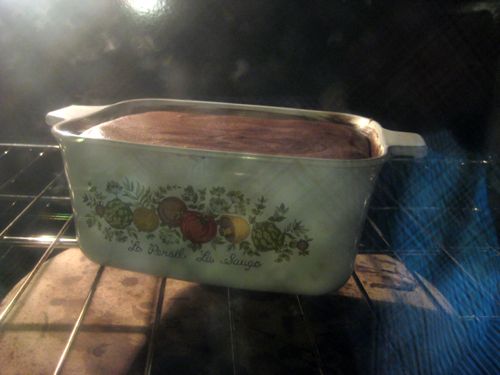
[About 15 minutes into the cooking.]
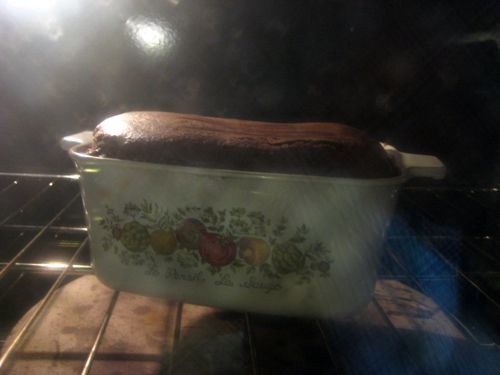
[About 20 minutes into cooking. A skewer was used to test for doneness. At 20 minutes, the skewer came out wet so the souffle was allowed to bake another 10 minutes.]
10. The soufflés should have risen by about two thirds of their original height and jiggle when moved, but be set on top.
[The souffle out of the oven after 30 minutes of baking.
A bit overcooked where the souffle seems a little dry. The skewer came out very clean.]

[No fancy plating.
We just dug into the souffle.
The final results were drier than I expected with the texture of a angel food cake. A soft, airy cake. Surprisingly very light, chocolatey and not overly sweet.
We remedied the dryness with a generous dollop of whipped cream. :-) ]
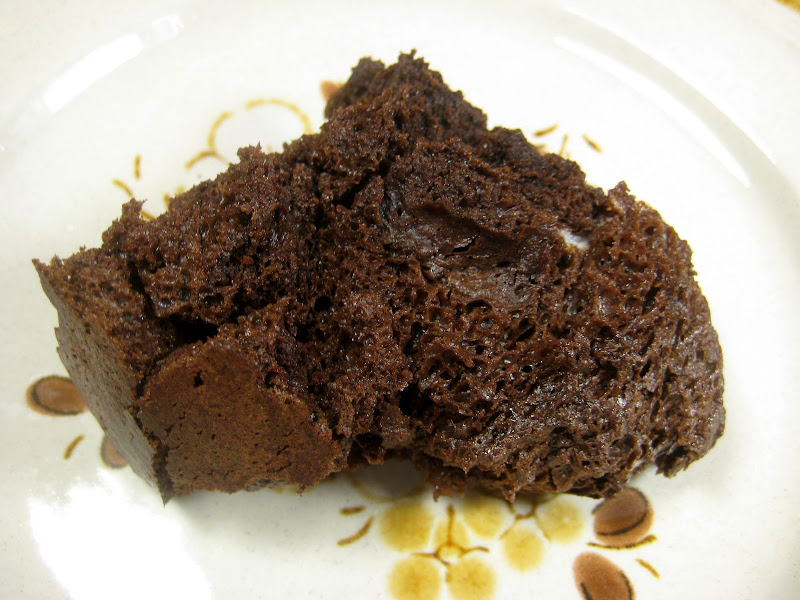
Overall, the chocolate souffle/angel food cake was delicious.
I will probably try the recipe again, but bake only 25 minutes before checking with a skewer. Also, I'll probably try a savory recipe. I'm on the fence whether souffles will become part of my standard recipe collection.
There are basically two parts to a soufflé recipe: the base and the egg whites. For savory soufflés, the base is usually a thick roux-based sauce made of butter, flour and milk or stock – to which you add the flavoring ingredients and the egg yolks. Sweet soufflés are based on a crème patisserie, or thick custard. The egg whites are beaten separately so that they incorporate lots of air bubbles; then the egg whites are folded into the base and the mixture spooned into a soufflé dish. After baking in the oven, the soufflé will magically rise. However, be warned that what goes up must come down: even a perfect soufflé will start to ‘deflate’ once you remove it from the oven - so be sure to serve it (or photograph it!) as soon as possible. In fact, Dave and Linda think the photographic aspect of this project may turn out to be more difficult than the culinary part.
[Eat4fun: I've always wanted to give a go at making a souffle. Here's my chance.
I'm typically a savory kind of guy, but this time around I choose the chocolate souffle.]
Chocolate Souffle
Adapted From BBC Good Food Recipe by Gordon Ramsay
Ingredients
FOR THE DISHES
2 Tbsp (30 ml) 1 oz (30g) unsalted butter, for greasing
Cocoa powder or finely grated chocolate
FOR THE CREME PATISSERIE
2 tbsp (30 ml) (18 gm) (2/3 oz) plain (all-purpose) flour
2 tsp (10 gm) (0.35 oz) caster (superfine) sugar (regular sugar is OK)
½ tsp (4½ gm) (0.15 oz) corn starch (aka cornflour)
1 medium egg yolk
1 medium whole egg
4 Tbsp (60 ml) milk
5 Tbsp (75 ml) heavy cream (or double cream)
3 oz (90gm) good-quality dark chocolate preferably 70+% cocoa solids, broken in pieces
2 Tbsp (30 ml) (15 gm) (½ oz) unsweetened cocoa powder
Optional: 2 tsp orange zest or 2 tsp minced chipotle chile en adobo or 1 tsp chipotle chile powder. (The chile version is a Monkeyshines favorite!) Optional: powdered sugar for dusting
FOR THE EGG WHITES
6 medium egg whites
6½ Tbsp (95 ml) 3 oz (90g) superfine/caster sugar (if you don’t have it, regular sugar is OK)
Directions:
1. Heat oven to moderate 375 ˚F/190 ˚C/gas mark 5.
2. Take four 1 cup/~240ml soufflé dishes and brush them completely with softened butter. Tip a little cocoa powder or grated chocolate into each dish, roll the dish around tilting it as you do so it is evenly lined all round.
[Instead of four 1 C ramekins, I used a larger 2 quart Pyrex dish.]
3. For the crème patisserie, mix the flour, sugar and corn starch into a small bowl. Put egg yolk and whole egg into a medium sized bowl, beat lightly, then beat in half of the flour mixture to give a smooth paste. Tip in the rest of the flour mixture and cocoa powder and mix well.
[The egg yolk mixture is pretty straightforward.]
[Amazing how the cocoa powder will mix in to form this very dark high viscosity liquid.]
4. To make the ganache, pour the milk and cream into a pan and bring just to the boil. Remove from the heat. Add the chocolate and beat until it is melted and smooth with no lumps.
[Whoa! This ganache is very watery, not like any ganache I've made in the past. Hopefully, the thick egg yolk mixture will compensate for the watery ganache.]
5. Gradually stir hot chocolate ganache into the paste from step 3, and add the orange zest or chile if using. This is your crème patisserie.
6. Whisk the egg whites to soft peaks with an electric whisk. Sprinkle in the sugar as you are mixing. Keep whisking to give stiff, firm peaks to give volume to the soufflés.
[Stiff Peaks. You must have patience with whipping egg whites to stiff peaks. It takes about 5 to 10 minutes so don't give up.]
7. Stir about 2 tbsp (30 ml) of the beaten egg whites into the crème patisserie. Carefully fold in a third of the rest, cutting through the mixture. Fold in another third (take
care not to lose the volume), then fold in the rest.
[Stirred in what was on the beaters plus a little more to lighten up the patisserie.]
[Adding the egg whites 1/3rd at a time.]
8. Spoon the mixture into the dishes. Run a spoon across the top of each dish so the mixture is completely flat. Take a little time to wipe any splashes off the outside of each dish, or they will burn on while cooking.
[Another trick is to wipe the edge of the dish so the mixture forms a little trench between the dish and the mixture. This is supposed to help the souffle rise in the center.]
9. Bake the soufflés for 15-17 minutes. [For a larger dish, I baked about 20 minutes and used a skewer to check for doneness. The skewer should come out clean. I ended up cooking for 30 minutes, but probably could have pulled the souffle out at 25.]
[The next three photos show the rising during cooking.
Just into the 350F oven.]
[About 15 minutes into the cooking.]
[About 20 minutes into cooking. A skewer was used to test for doneness. At 20 minutes, the skewer came out wet so the souffle was allowed to bake another 10 minutes.]
10. The soufflés should have risen by about two thirds of their original height and jiggle when moved, but be set on top.
[The souffle out of the oven after 30 minutes of baking.
A bit overcooked where the souffle seems a little dry. The skewer came out very clean.]
[No fancy plating.
We just dug into the souffle.
The final results were drier than I expected with the texture of a angel food cake. A soft, airy cake. Surprisingly very light, chocolatey and not overly sweet.
We remedied the dryness with a generous dollop of whipped cream. :-) ]
Overall, the chocolate souffle/angel food cake was delicious.
I will probably try the recipe again, but bake only 25 minutes before checking with a skewer. Also, I'll probably try a savory recipe. I'm on the fence whether souffles will become part of my standard recipe collection.
Thursday, October 14, 2010
Oct 14, 2010: Daring Cooks - Dolmades

Our October 2010 hostess, Lori of Lori’s Lipsmacking Goodness, has challenged The Daring Cooks to stuff grape leaves. Lori chose a recipe from Aromas of Aleppo and a recipe from The New Book of Middle Eastern Food.
Stuffed grape leaves, with meat or without, they are delicious on their own or on some pita bread as a sandwich. You can eat them simply, drizzle with olive oil and lemon juice and sprinkle on some feta and you have a delicious appetizer, serve with tomato, cucumber wedges and kalamata olives.
Recipe Source: Two recipes for October.
One of the recipes comes from Aromas of Aleppo written by Poopa Dweck and Michael J. Cohen. The other is from Claudia Roden's, The New Book of Middle Eastern Food.
[I opted to make the one with meat.]
Historical Note: Stuffed grape leaves are a part of many cultures including the Syrians, the Turks, the Greeks, the Lebanese, the Albanians, the Israeli's, the Iranians, the Iraqis and the Armenians (just to name a few). Generally speaking the stuffed part could be in zucchinis/courgette, eggplant, tomato or peppers. Really it also extends to stuffing certain types of fish as well. It is suggested that the origin of stuffed grape leaves goes back to the time when Alexander the Great besieged Thebes. It has also been suggested the Byzantines refined and spiced up the recipe and used the leaves of other vines such as hazelnuts and figs.
Mandatory: The challenge this month is to make a filling and roll it in grape leaves. If grape leaves are unavailable to you then you can use Swiss chard, kale, cabbage or some tough green.
Variations allowed: Grape leaves can usually be found in jars at Mediterranean stores or grocery stores that have ethnic foods. Do stick with a tougher green if you cannot find grape leaves. Spinach, a delicate green, will not hold up to the boiling process. I highly encourage you to use grape leaves if you can.
[Finding brined grape leaves was harder than I thought. I ended up using mostly cabbage leaves. I did plant grapes a few years back, but wasn't sure if the leaves were too mature for stuffing.]
Grape Leaves Stuffed with Ground Meat and Rice with Apricot Tamarind Sauce/ Yebra
Adapted from Aromas of Aleppo by Poopa Dweck and Michael J. Cohen. Published by Harper Collins, 2007
Yield: 6 to 8 servings
Ingredients for hashu/filling:
1 pound (455 gm) ground (minced) beef
1/3 cup (80 ml) (2 1/3 oz) (65 gm) short grain rice
1 teaspoon (5 ml) (6 gm) all spice
2 tablespoons (30 ml) vegetable oil
1 teaspoon (5 ml) (6 gm) cinnamon
1 teaspoon (5 ml) (3 gm) kosher (coarse) salt **if using regular table salt only use ½ tsp.**
¼ teaspoon (1¼ ml) (1½ gm) white pepper
1 onion, chopped **optional**
1 cup (5½ oz) (150 gm) pine nuts **optional**
Directions:
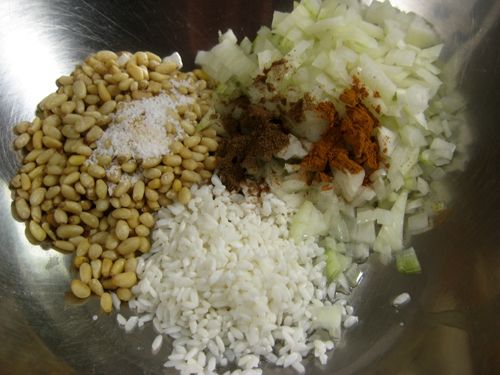
1.Soak rice in water, enough to cover, for 30 minutes. Combine meat, rice, allspice, vegetable oil, cinnamon, salt, white pepper, and if desired, onion and pine nuts, in a large mixing bowl. Mix well.
[Straightforward list of ingredients. I found mixing the spices with the non-meat ingredients make for a uniform distribution in the meat. Also, with ground meats I try to mix and compact as little as possible. I don't want hockey pucks... lol :-) ]
Ingredients for assembly:
1 pound (455 gm) hashu/filling (see recipe above)
36 preserved grape leaves, stems trimmed, drained, rinsed and patted dry
1 tablespoon (15 ml) vegetable oil
6 dried apricots – or more if you desire
3 tablespoons (45 ml) tamarind concentrate **if you can’t find it, you can omit it**
¼ cup (60 ml) freshly squeezed lemon juice
1 tablespoon (15 ml) (9 gm) kosher (coarse) salt **if using regular table salt only use 1.5 tsp.**
Notes:
Tamarind is actually fairly easy to find. There is a paste that is in package already made up. You can find it at Asian, Mexican or Indian grocers. You can also find the pods (a little more difficult) and make it yourself. It is akin to a sweet/tangy tea flavor. If you can’t find it, you can skip the sauce all together. The grape leaves will be just as delicious without the sauce. But we hope that those that can find it will use it.
[Interesting tamarind is called out for this recipe. I didn't know tamarind made it out into Middle Eastern/Greek cuisine.
I bought some tamarind to use for another purpose, which I haven't gotten to... so I used some for this dish.]

[What I did was soak 1/4 C tamarind in 1 C of boiling water. I used the 1T to 1/4 C water ratio.
I let soak for about 15 minutes and pressed the entire contents through a sieve. The strained mash is what was used for this dish.]

Directions:
1.Place a grape leaf on a flat surface, vein side up. You can trim the little stem if you would like.
[My grape plant... The plant was found on the clearance aisle at the local garden center. It's been 3 years and it's still alive. :-) One of the reasons I planted a grape was to use the grape leaves. This is my opportunity. lol... It's to cold in my area to expect grapes.
I only picked a few of the youngest looking leaves, a little larger than my hand. It's a little late in the season to use grape leaves, but we'll see if it works.]

[Washed and ready for a 1 minute plunge into boiling water.]

2.Place about two teaspoons (10 ml) of the filling in the center of the leaf, near the stem edge.
[In the mean time, I used cabbage leaves.]

3.Roll the leaf end to end, starting from the stem edge. As you roll, fold the sides of the leaf in toward the center. The leaf should resemble a small cigar, about 2 to 2 1/2 inches (50 mm to 65mm) long.
[Start about 1/3rd from and end to place the meat. The rest is like wrapping a burrito.]
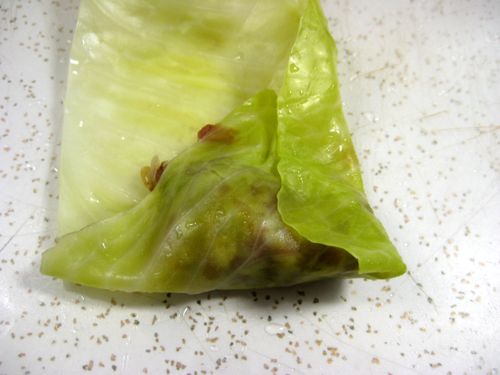
[Rolling the grape leaves... The seem tender enough.]

4.Repeat with the remaining leaves and filling.
a.(You can freeze the stuffed grape leaves at this point. Just line a baking sheet with wax paper. When firmly frozen, transfer to an airtight plastic bag place back in the freezer.)
5.In a medium saucepan put in the vegetable oil and then place the filled grape leaves in the pot.
6.Place apricots in between the stuffed grape leaves. Cover and cook over low heat for 5- 8 minutes or until the grape leaves begin to sweat.
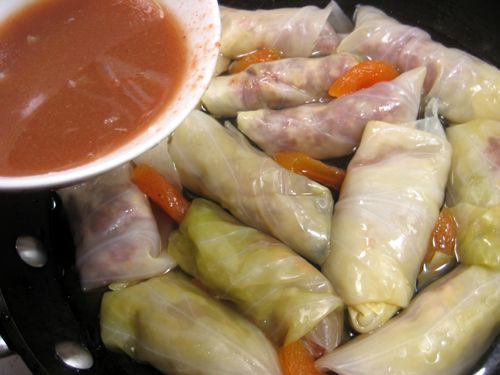
7.Using all three tablespoons, place a little of the tamarind concentrate, if using, over the rolls.
8.Combine lemon juice, salt, and water then add to pan, filling it ¾ full.
[The tamarind mixture poured over the cabbage rolls and dried apricots.]
9.Weigh down the grape leaves with a heat proof plate or board to prevent them from unraveling. Cover and bring to a boil over medium high heat. Reduce the heat to low and simmer for about 40 minutes.
[Weighed down for a 40 minute simmer.]

a.Alternatively, place the saucepan in an oven preheated to moderate 350°F/180°C/gas mark 4 and cook for an hour.
10.Spoon cooking liquid over the grape leaves occasionally. You will know they are done, when the grape leaves are neither soupy nor dry.
11.Tilt pan sideways over serving platter, allowing the grape leaves to tumble out. Try not to handle them individually to reduce unraveling.
a.Alternately you can try spooning them out very gently.
The finished goods!
[The rolls maintained their shape. A good sign. :-)]
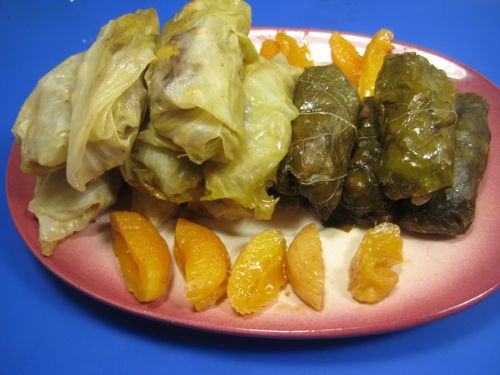
[Flavor is not bad. I wasn't sure if I would dig the cinnamon, allspice and ground beef combination. It wasn't too bad and not overpowering.
The cooked pinenuts had an interesting (in a good way) texture, almost like a cooked soy beans/edamame - firm but tender.]

Monday, September 27, 2010
Sep 27, 2010: Toe-Bee is 8!
Toe-Bee the beagle is now 8 years old! That's 51 in human years!
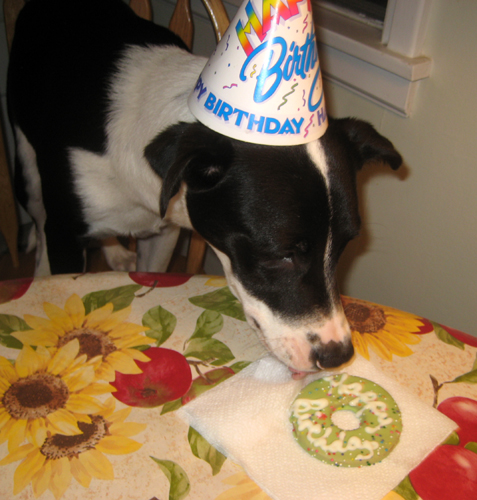
We had a little treat for the pups!
The par-tay crew! Woo-hoo!
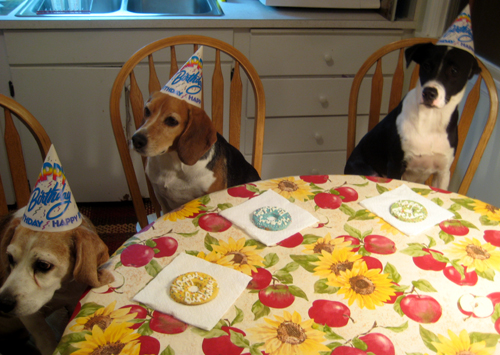
Toe-Bee the Birthday pup is 8 years old [51 human years]. Wow! No wonder he's graying around the muzzle.

Brutus is 12 years old [69 human years]. He's at the age where he has selective hearing, but he still doesn't act his age.

Buster is 9 months [11 human years]. He's the young whipper-snapper amongst us old dogs. Full of energy and the propensity to chew.
Ref: Dog Age Calculator @ WebMD
We had a little treat for the pups!
The par-tay crew! Woo-hoo!
Toe-Bee the Birthday pup is 8 years old [51 human years]. Wow! No wonder he's graying around the muzzle.
Brutus is 12 years old [69 human years]. He's at the age where he has selective hearing, but he still doesn't act his age.
Buster is 9 months [11 human years]. He's the young whipper-snapper amongst us old dogs. Full of energy and the propensity to chew.
Ref: Dog Age Calculator @ WebMD
Sep 27, 2010: Daring Bakers - Decorated Sugar Cookies

The September 2010 Daring Bakers’ challenge was hosted by Mandy of “What the Fruitcake?!” Mandy challenged everyone to make Decorated Sugar Cookies based on recipes from Peggy Porschen and The Joy of Baking.
She has challenged us to make Decorated Sugar Cookies. She's not talking squiggles random squiggles and dots. She's talking about beautifully decorated cookies that are perfect to give as a gift or to make for party or wedding favours. On top of that, we should theme the cookies around the month of September.
For the cookie, Peggy Porschen’s recipe is ued for the challenge recipe. Sugar cookie recipes commonly have either baking powder or bicarb of soda, but this recipe is a little different in that it doesn’t use a raising agent which makes them great so if you’re using intricate cookie cutters, they hold their shape while baking. Perfect for decorating with royal icing!
[My comments are in red... I'm inexperienced at decorating so there's no way I can make wedding favors... lol.]
[This will be my last Daring Baker's challenge.]
[Life has been very busy and trying to do both a Daring Bakers and Daring Cooks challenge in a month has been difficult to complete with the detail and time I like putting into each challenge.
Also, I don't feel right calling myself a "Daring Baker" if I'm not doing ALL the challenges (even if we are given an option of miss a few challenges a year) or cherry picking the challenges that fit my schedule.
Since I have two years of Daring Baking under my belt where I completed 26 out of 27 challenges, I've decided to retire from Daring Bakers and focus on Daring Cooks. :-)
Who says that guys are afraid of commitment? lol!]
Recipe Source:
Basic Sugar Cookie recipe adapted from Peggy Porschen : http://www.peggyporschen.com/images/press/pdf/Coso-Bride-Oct-Nov-2008.pdf
Also found in her book: “Romantic Cakes” http://www.peggyporschen.com/book-detail.asp?ID=2
Royal Icing recipe adapted from The Joy of Baking : http://www.joyofbaking.com/RoyalIcing.html
Mandatory: You must make the Basic Sugar Cookie recipe provided (unless specific diet restrictions apply) You must make your cookies with the theme of September, whatever that means to you.
Variations allowed:
You are allowed to add your own flavourings to the dough
You don’t have to make your own royal icing from scratch, you may use a store bought mix.
Basic Sugar Cookies:
Makes approximately 36 x 10cm / 4 inch cookies
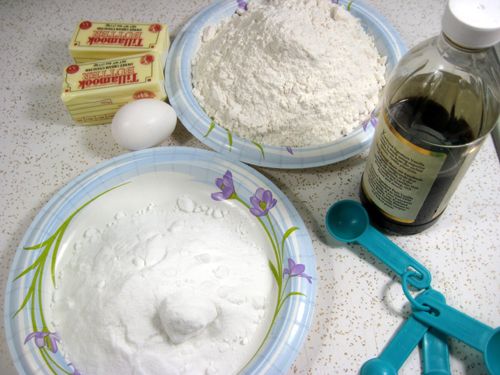
200g / 7oz / ½ cup + 6 Tbsp Unsalted Butter, at room temperature
400g / 14oz / 3 cups + 3 Tbsp All Purpose / Plain Flour
200g / 7oz / 1 cup Caster Sugar / Superfine Sugar
1 Large Egg, lightly beaten
5ml / 1 tsp Vanilla Extract / Or seeds from 1 vanilla bean
[Fortunately, this challenge doesn't require a lot of ingredients and fancy preparation or equipment.]
Directions:
Preheat oven to 180°C (160°C Fan Assisted) / 350°F / Gas Mark 4.
Cream together the butter, sugar and any flavourings you’re using. Beat until just becoming creamy in texture. Tip: Don’t over mix otherwise you’ll incorporate too much air and the cookies will spread during baking, losing their shape. Beat in the egg until well combined, make sure to scrape down the sides of the bowl.
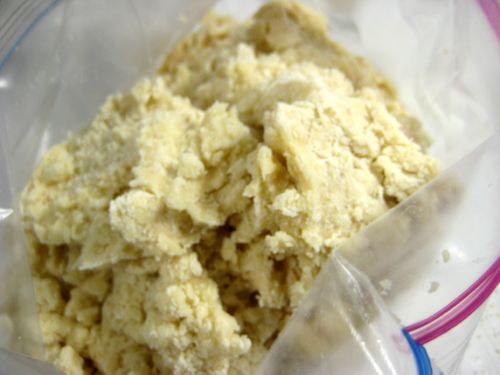
Add the sifted flour and mix on low until a non sticky dough forms. Tip: I don’t have a stand mixer so I find it easier to switch to dough hooks at this stage to avoid flour flying everywhere.
[I used a hand mixer to incorporate a majority of the ingredients. The dough needed some kneading to consolidate the crumbly dough. I poured it all into a ziploc bag and kneaded. No messy hands! lol!]
Knead into a ball and divide into 2 or 3 pieces.
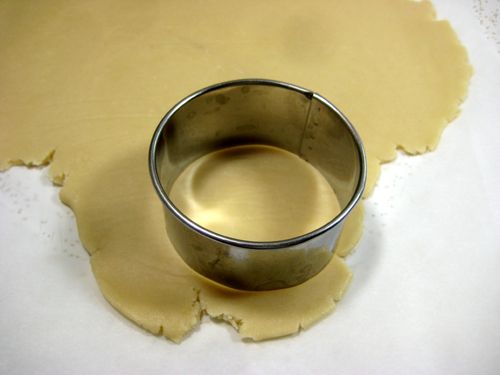
Roll out each portion between parchment paper to a thickness of about 5mm/1/5 inch (0.2 inch) Refrigerate for a minimum of 30mins.
Cut out shapes with cookie cutters or a sharp knife. Arrange shapes on parchment lined baking sheets and refrigerate for another 30mins to an hour. Tip: It’s very important you chill them again otherwise they’ll spread while baking. Re-roll scraps and follow the above process until all scraps are used up.
[After the dough was rolled between parchment paper, a 3" cookie cutter was used to make rounds.]
[Rounds ready for baking at 350F for 15 minutes. 8 minutes didn't brown the cookies enough]
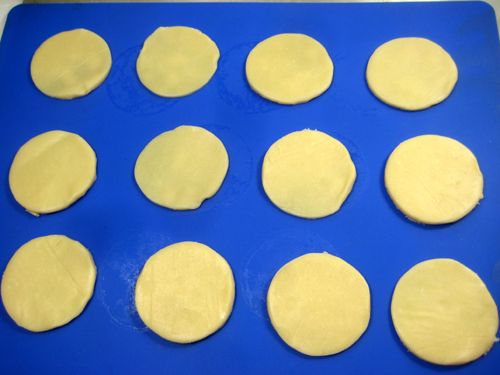
Bake until golden around the edges, about 8-15mins depending on the size of the cookies. Tip: Bake same sized cookies together otherwise mixing smaller with larger cookies could result in some cookies being baked before others are done. Tip: Rotate baking sheets half way through baking if your oven bakes unevenly.
Leave to cool on cooling racks. Once completely cooled, decorate as desired. Tip: If wrapped in tinfoil/cling wrap or kept in airtight containers in a cool place, un-decorated cookies can last up to a month.
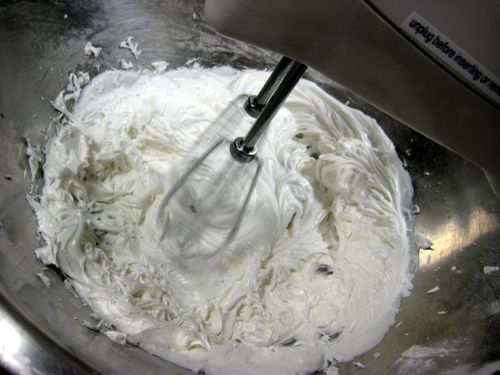
[I opted to avoid using raw egg whites so I used Wilton meringue powder instead.]
Royal Icing
3 T Meringue Powder
1 lb Powdered Sugar
6 T Water
Beat until stiff peaks.
[For the meringue, I used food coloring to make a yellow color and 1 tsp of cocoa powder mixed with a little water (to form a slurry which makes for easier mixing into the royal icing) to make a dark meringue.]
SEPTEMBER THEME: SUNFLOWERS
I've always been fascinated with sunflowers. These are tall, majestic plants that are able to follow the sun and give us sunflowers seeds to eat. Sunflowers are usually abundant in September.
Last year, a sunflower grew in a patch of soil where no seeds were planted. I think it was a seed from two years ago that survived the winter and decided to grow the following year.
Here's my "evolution of the Sunflower" photo. As I mentioned, I'm not that good at piping, especially when using a plastic storage bag with a end cut off. You can see the different things I've tried to to come up with something decent looking.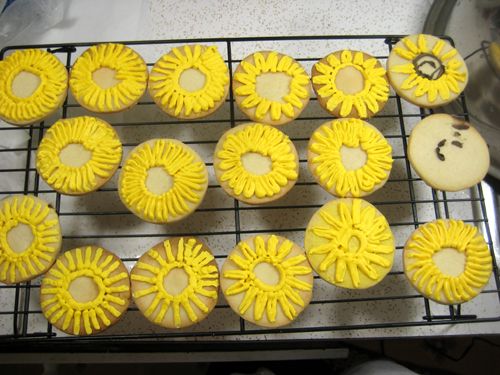
Early attempt at piping the petals. I tried to form a leave.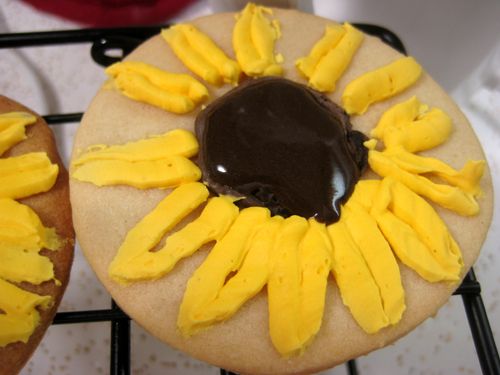
As I experimented around, I started piping lines... which looks better.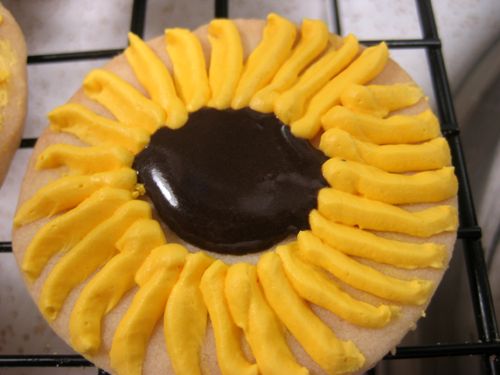
Finally, more lines and a ring in the center to hold the eye.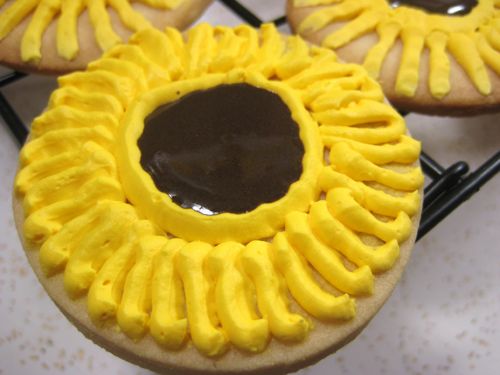
My flower arrangement... lol
Of course, the best looking cookies were in the center. :-)
My inspiration... I'm not sure if this is a sunflower that was in the bouquet, but I think it is. :-)
I've had fun in my 2 years (and a bit) as a Daring Baker. I enjoyed learning new things... My favorites are salted caramels, making puff pastry and making cannoli. The salted caramel is a recipe I make quite often as gifts. :-)
On to Daring Cooks!
Tuesday, September 14, 2010
Sep 14, 2010: Daring Cooks' Apple Butter
The September 2010 Daring Cooks’ challenge was hosted by John of Eat4Fun. John chose to challenge The Daring Cooks to learn about food preservation, mainly in the form of canning and freezing. He challenged everyone to make a recipe and preserve it. John’s source for food preservation information was from The National Center for Home Food Preservation.
Hello Daring Cooks! I have the honor of hosting this month's challenge. I’m John from Eat4Fun.
[Yes, that's me! I'm hosting this month's Daring Cooks' Challenge! Woo Hoo!
I wanted to provide a challenge that was unique, provide information that people could use beyond the challenge and a challenge that was vegetarian/vegan friendly. Also, I wanted to use ingredients that were readily available.
I gave two options canning or freezing. Canning requires that you buy jars and lids while, a less expensive option, is freezing where you can find good containers for under $5 for a multi-pack.]
When Lis and Ivonne asked if I would host a challenge, I jumped at the chance. Being a person who enjoys experimenting around with different cooking techniques and learning about new topics, I racked my brain trying to figure out what to present. Chinese cooking? Grilling? Barbecuing? Roasting? Tofu making?
I finally decided on a topic that takes advantage of the time of year where, in the Northern Hemisphere, our gardens and local farms should be harvesting an abundance of fresh fruits and vegetables.
For this month's challenge, I hope to whet your appetite on the vast topic of Food Preservation. Food preservation is a broad subject covering canning, freezing, drying, pickling, fermentation and jam making, but for this challenge the focus will be on freezing and home canning. The main recipe for our challenge will be apple butter. However, a couple additional recipes are provided for a little added variety.
Apple butter is essentially an apple sauce that’s been cooked down with spices to form a thick spread. No butter is used in making apple butter. “Butter” just refers to the spreadable consistency of the final product. Talking with a family friend, she mentioned that apple butter was a way of using the scraps, skins and cores, after making apple sauce. The spices were added to flavor the scraps. Nowadays, recipes use the whole apple, which is what we’ll use for this challenge.
Disclaimer: Since I am an engineering geek, I present a lot of technical information on food preservation. The apple butter is actually a very simple recipe, so please do not be discouraged by the information and jargon used in this write-up.
Why Preserve Foods?
There are many reasons – save the harvest from our garden for later in the year, control the ingredients that go into our food, nostalgia (memories of our parents or grandparents), make gifts, satisfaction of making it yourself… etc. For me, it’s curiosity, controlling what I eat and just the satisfaction of making it myself.
Why foods go bad?
Before we start preserving foods, we need to know why foods spoil.
The two main culprits are
1) The obvious culprit is bacteria, molds and yeast/fungi. I call them “bad bugs.” There are “good bugs” that help with fermentation (yogurt, beer, wine, sourdough breads and pickles), but the bad bugs rots foods, gives foods an off taste and can make us sick.
2) The other culprit is enzymes. Enzymes are molecules that occur naturally in food which encourage chemical changes, some of which are desirable - help ripen fruit by converting starch to sugar, soften fruits or vegetables, or reduce acidity level. Some changes are not desirable, browning when an apple is cut, or the fruit becomes overripe where the flesh becomes soft and mushy.
The other supporting culprits are oxygen and unintentional moisture loss. Fortunately, when we eliminate microorganisms, the rest of the culprits are taken care off at the same time.
Good bugs and bad bugs keep growing and growing?
Bacteria, molds and yeast are living organisms that are present at all times – in the air, on surfaces, and on our food. In order for organisms to survive, they need food, water, oxygen (although some microorganisms can survive without oxygen) and a comfy environment.
A better way to remember food, water, oxygen and comfy place to live is by remembering “FATTOM” or “FAT TOM”. No, FATTOM is not the guitar riff to “Smoke on the Water” [F-A-T, T-T, O-M; F-A-Tee-Tee-O-M]. FAT TOM represents the six conditions microorganisms need to grow/multiply.
FAT TOM is Food, Acidity, Temperature, Time, Oxygen and Moisture.
* Food - Microorganisms, like people, need nutrients. Unfortunately, that means microorganism eat what we eat. Some microorganisms can get by with sugar while other need protein. The foods of concern from a food safety standpoint are low acid, protein rich foods, such as, meat, dairy and egg containing foods.
* Acidity – Acidity is a value between 0 to 14 (known as pH) where values less than 7 are acidic and values above 7 are alkaline. For example, water is generally neutral at pH = 7 while vinegar is acidic with a pH between 2.4 and 3.4. Most foods we eat have a neutral to acidic pH where foods with values 4.6 or higher are considered low acid foods.
* Temperature – Temperatures between 40F (4.4C) to 140F (60C) is considered the Temperature Danger Zone (TDZ) where microorganisms can grow. The optimal temperature for growth is typically between 70F (21C) to 100F (38C). Note: In the USA, the FDA is lowering the higher temperature from 140F to 135F (57C).
- Food Safety Tip: Hot foods should stay hot, above 140F (60C). Cold foods should stay cold, below 40F (4.4 C)
* Time – Given the right conditions and temperatures 40F to 140F, microorganisms start growing. Given enough time, the population will grow rapidly to levels that can make us sick.
- Food Safety Tip: Two hour rule and the Four hour rule.
Foods kept at room temperature (in the TDZ) should be refrigerated before two hours. Foods are to be thrown out after 4 hours in the TDZ. For hot days, for example a 90F (32C) day, the time is cut in half.
- Food Safety Tip: Also, cooling foods in the refrigerator, foods should be cooled within two hours (from 140F (60C) to 70F (21C)). Of course, faster is better. For example, a pot of chili beans can be cooled quickly by pouring into a baking dish where the chili beans are spread out into a thin layer.
* Oxygen – Most microorganisms need air. There are a couple bad bugs that don’t need air to grow where Clostridium botulinum (Botulism), being the most notorious bad bug that prefers a no oxygen environment.
* Moisture – Pure water is the key to life while salt water is less desirable.
How does knowing FAT TOM help us preserve food?
Food preservation works by changing the condition of our food to discourage bad bug growth. Food is what we are trying to save and Time is beyond our control. The remaining factors we can change are Acidity, Temperature, Oxygen and Moisture.
For this daring challenge, we will be focusing on Freezing and Boiling Water Canning.
Freezing:
Freezing refers to storing foods in airtight containers at 0ºF (-17.8ºC) or lower. Freezing does not kill bad bugs. The cold temperature causes the microorganisms to go into hibernation/suspended animation.
Freezing is the easiest food preservation method, especially with modern freezers.
The main pointers for freezing:
1) Freeze foods quickly. Quickly freezing creates smaller ice crystals. Water is a funny substance where water expands when frozen. This means larger ice crystals can puncture cell walls (such as whole berries) so when defrosted you end up with a mushy mass.
2) Try not to freeze too much at once. Typical advice 2 to 3 lbs (1 kg) per cubic foot (28 L) of freezer space.
3) Containers should be airtight and leak proof.
4) Minimize air and gaps in the packaging. This reduces the chance for freezer burn – drying.
5) Label and date the package. Frozen foods tend to look the same over time, especially when a layer of ice has formed.
6) Vegetables can be blanched to deactivate enzymes. Blanching is quick cooking in boiling water for a few minutes and cooled rapidly in ice water.
7) For initial freezing using pliable freezer bags, freeze on a smooth, flat surface to prevent the bag from molding itself to the rack.
Boiling Water Canning:
Boiling water canning sterilizes the food using the temperature of boiling water. The jars form a vacuum seal which creates a low air/oxygen environment.
Important!
The temperature that water boils varies with altitude. At sea level, water boils at 212ºF (100ºC) while at 5,000 ft (1524 m) water boils at 203ºF (95ºC). What this means is canning (processing) times increase with altitude. Fortunately, we don’t need to do the math. Canning recipes include processing times for different altitudes
Boiling water canning is appropriate for high acid foods (foods with pH values lower than 4.6). Typically, fruits are high acid foods while vegetables are low acid. There are a few fruits that are on the border (pH 4.6), such as, tomatoes. However, some borderline pH foods can be acidified by adding vinegar or lemon juice. In home canning, lemon juice (and lime juice) refer to bottled concentrate, unless the recipe calls for fresh. Also, vinegar refers to vinegar with 5% acidity. The percentage strength can be found on the label.
In the USA, home canning uses Mason jars, a thick-walled jar. The lid is a two piece assembly – the lid with a reddish sealing compound and a metal band/ring.
Jars should be inspected before each use – looking for cracks and chips. Washed with detergent dish soap and dried. To reduce thermal shock (hot food cracking a cold jar), the jars should be kept hot. Clean jars can be kept hot by submerging in the boiling water canner or in a dishwasher. Also, a warm oven can be used.
For processing (canning) times less than 10 minutes, the jars need to be sterilized for 10 minutes in boiling water. For altitudes higher than a 1,000 ft (305 meters), an additional minute is added for each 1,000 ft (305 meters) above sea level.
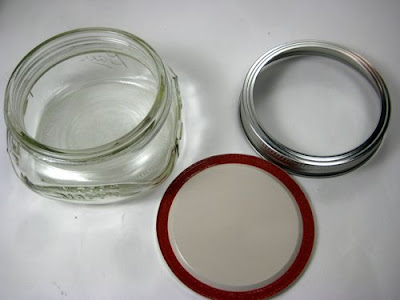
Figure illustrates the jars and lids used in the USA.
The basic steps for using a boiling water canning.
1. Check your jars for chips, cracks and nicks. Wash and preheat your jars.
2. Fill you canner half full with water. Preheat water to 140ºF (60ºC) for raw packing foods or 180ºF (82ºC) for hot packing foods.
3. Fill jars with food prepared according to the recipe, remove bubbles and adjust headspace.
4. Load jars into the canner. It’s important to keep the jars level.
5. Add more hot water, as needed, so the jars are submerged by at least 1 inch (2.54 cm) of water.
6. Cover the canner with the lid and turn the heat to high.
7. Set timer when the water comes to a vigorous boil. You can lower the heat, but the boil must be maintained.
8. When the time is up, turn off the heat and remove the lid. Wait 5 more minutes.
9. Remove jars making sure the jars are level and set on a towel. Allow to cool to room temperature, undisturbed for 12 to 24 hours.
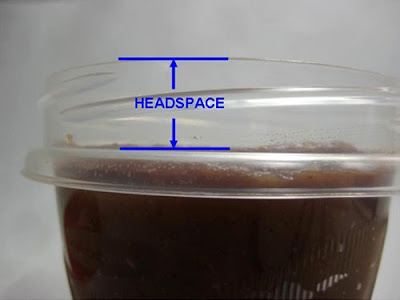
Terminology
Headspace – is the gap between the top of the container to the level of the liquid or food.
For freezing, headspace is important to ensure there is room in the container for the expanding food. For canning, headspace ensures that a proper vacuum seal will form without the food spilling out of the jars while canning.
Raw Pack (canning) – foods are placed in jars raw and, typically, a flavored liquid is added to the jars before processing. Advantages: Food is not cooked twice. Retains shape better. Disadvantages: Uses more jars. Foods may float due to trapped air.
Hot Pack (canning) – foods are cooked before jarring. Advantages: Foods are cooked down so more can be packed into a jar. Less air in food. Disadvantages: Original shape is lost.
Recipe Source:
Reduced Sugar Apple Butter from The National Center for Home Food Preservation – [http://www.uga.edu/nchfp/how/can_02/apple_butter_reduced.html]
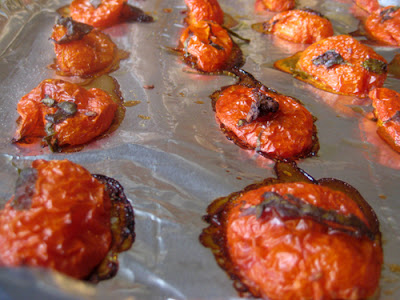
Oven Roasted Tomatoes from Susy Hymas, Master Food Preserver
Bruschetta in a Jar from the Bernardin Canning website.
[http://www.bernardin.ca/pages/recipe_page/51.php?pid=435]
Blog-checking lines:
Posting Date: September 14, 2010
Note:
For making apple butter, I do not have a food mill. The first time I made this recipe, I used apples with the stem and blossom end removed. I pressed the soft cooked apples through a mesh strainer. The resulting apple butter yield was barely 3 cups. Therefore, I recommend using peeled and cored apples to yield 5 to 6 cups of apple butter.
Mandatory:
I want all you daring cooks to try canning or freezing one of the recipes presented in the challenge. If you’re leery about making the full recipe, feel free to half a recipe. How much your freeze or can is up to you. My goal is to have you all become comfortable with food preservation.
The apple butter can be frozen or canned while the oven roasted tomatoes are better suited for freezing. The bruschetta is best canned due to the raw tomatoes. Raw tomatoes tend to become soft when frozen and defrosted.
Variations allowed: If you are familiar with home canning and would like to show us your favorite up to date recipe, please feel free to show us your recipe. Remember to reference the source for your recipe.
Preparation time:
- Apple Butter
Preparing Apples: 10 Minutes (if you leave the skin on)
20 Minutes if you peel and core apples
Cooking: 20-30 Minutes to soften apples for mashing + 2 hours to make Apple Butter.
Boiling Water Canner: 40 Minutes
- Roasted Tomatoes
Preparation: 10 Minutes
Cooking: 1 Hour
- Bruschetta in a Jar
Preparation: 15-30 minutes
Canning: 30 Minutes
Equipment required:
Apple Butter
• Knife
• Measuring Cup
• Measuring Spoons
• 8 Quart (about 7½ litres) Sauce Pan or Pot
• Potato Masher
• Storage Container/Containers to hold 5 to 6 cups
Optional:
o Scale
o Vegetable Peeler
o Food Mill
o Freezer Bags/Containers
o Boiling Water Canner
- Pot with Lid
- Rack
- Jars with lids and bands
- Bubble Remover (can use small spatula or plastic knife)
- Wide Mouth Funnel
Roasted Tomatoes
• Knife
• Roasting Pan
• Mixing Bowl
Bruschetta in a Jar
• Knife
• Measuring cups and spoons
• Cutting Board
• Sauce Pan
• Boiling Water Canner + Accessories
• Scale (Optional)
Recipes: Reduced Sugar Apple Butter Recipe
My preference is to use sweet apples (Golden Delicious) so the need for sugar is reduced. However, tart apples (Granny Smith) can be used. It’s a matter of personal preference.
Note: * If you used peeled and cored apples. I recommend buying 5 lbs (2.26 kg) of apples.
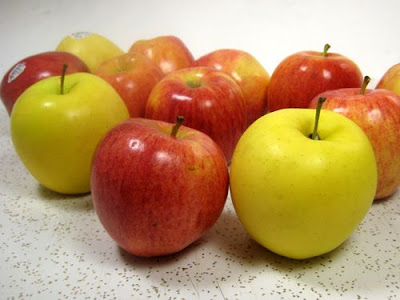
Gala and Golden Delicious Apples
Directions:
1. Wash apples well and remove stems. Cut apples into quarters or eighths and remove cores.
Note: I ended up peeling the apple at this step.

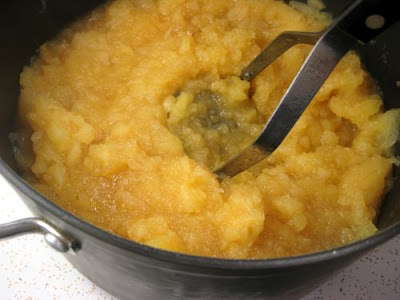
2. Combine unpeeled apples and cider in 8-quart (about 7 ½ litre) saucepan. Cook slowly and stir occasionally to prevent sticking. Cook until apples are very soft (falling apart).

3. Position a food mill or strainer securely over a large bowl. Press cooked apples with cider through the food mill or strainer to make a pulp. Be sure to collect all the pulp that comes through the food mill or strainer; for example, scrape any pulp clinging under the food mill into the bowl.
Note: Since the apples were peeled, I just mashed in the pot.
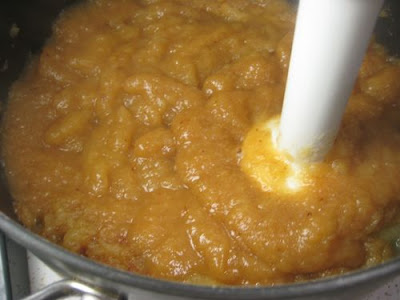
4. Combine pulp with Sucralose and spices in an 8-quart (about 7 ½ litre) saucepan. Simmer over low heat, stirring frequently.
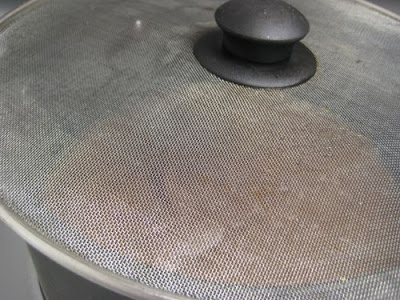
Note: A stick blender was used to mix the spices and creates a smoother apple butter. Also, when cooking down the apples, you want to leave the lid ajar or use a splatter screen. This will allow for evaporation. Another trick is to support the lid by laying two wooden spoons across the top of the pot.
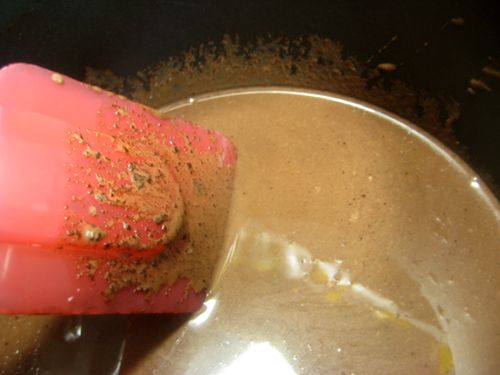
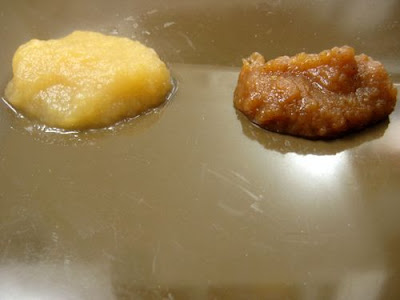
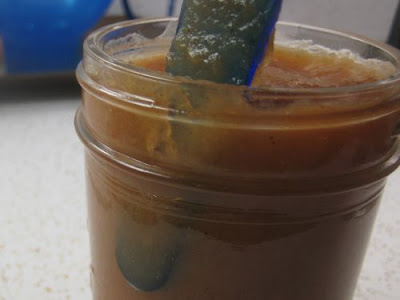
5. To test for doneness, spoon a small quantity onto a clean plate; when the butter mounds on the plate without liquid separating around the edge of the butter, it is ready for processing. Another way to test for doneness is to remove a spoonful of the cooked butter on a spoon and hold it away from steam for 2 minutes. It is done if the butter remains mounded on the spoon.
Note: It may be difficult to see, but the sample on the left is the apples sauce from step 3. The apple sauce left a liquid ring while the apple butter did not.
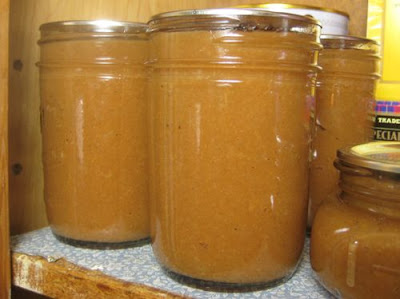
6. Pour contents into desired storage container or multiple containers. I stored my apple butter in 1-cup (250ml) plastic containers with screw on tops. Refrigerate up to 2 weeks, freeze up to a year, and home canning is good for a year.
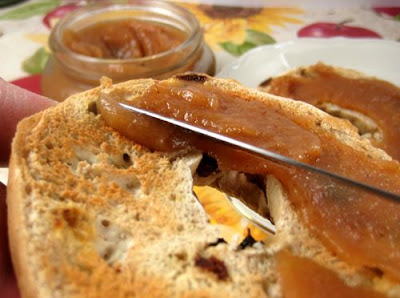
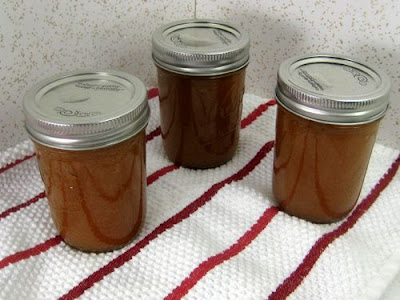
* The Finished Apple Butter:
Apple Butter is often used as a spread. However, apple butter can also be used as a condiment (pork chops or in marinades) or as an ingredient to an apple quick bread.
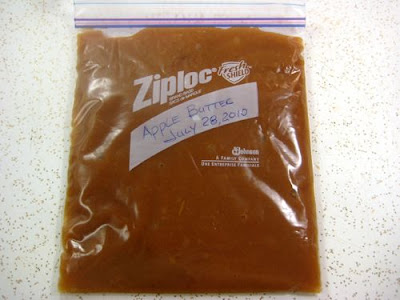
* Freezing:
I used a freezer bag where I expelled as much air as possible and minimized the gaps in the bag. Freezer bags work well for storage since they can lay flatter in the freezer than containers.
With a container, you need to ensure you have “headspace”. Headspace is the gap between the food (or liquid level) and the top of the container. Typical, headspace when freezing foods is 1/2 “ (1.27 cm) for straight sided containers. As mentioned previously, water expands when freezing. The headspace allows room for expansion.
Thawing: The best method (Food Safety) is to thaw in the refrigerator for a day.
Cold water, 70ºF (21ºC) or lower, can be used for as quicker way to defrost. The frozen food is submerged under running water. An alternative to running water is to change the water every 30 minutes. If you need an even faster method to defrost and you plan to cook the food immediately, the microwave is another method (of last resort).
* Boiling Water Canning:
For our challenge, apples are high acid foods. Golden delicious apples have an approximate pH of 3.6. Boiling Water Canning is an appropriate method of preserving apple butter.
Apple Butter processing information:
Headspace when canning apple butter is 1/4 “ (0.64 cm)
Processing Time:
15 minutes for altitude of 0 ft (0 m) to 1,000 ft (305 m)
20 minutes for altitude of 1,001 ft (305.1 m) to 6,000 ft (1828.8 m)
25 minutes altitudes above 6,000 ft (1828.8 m)
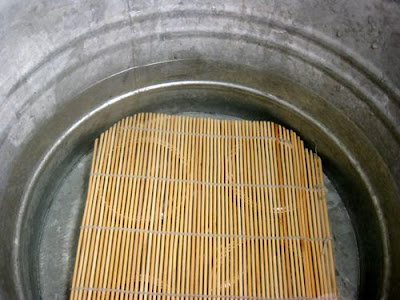
For boiling water canning, you need a pot that is high enough to cover the jars with at least 1” (2.5 cm) of water. Also, a rack, to prevent thermal shock, is used to keep the jars off the bottom of the pot. Any type of rack will work – a tea towel, a trivet, tying together unused bands… etc. I improvised a rack by tying metal bands to a bamboo sushi mat.

Also, for my pot, I used a large tamale steamer.
Jars are filled using a wide mouth funnel. A plastic bubble remover is run along the sides of the jar, in an up and down motion, to remove air pockets.
The top and side of the jar are wiped down with a damp paper towel.
Headspace is measured to ¼" (6.5mm).
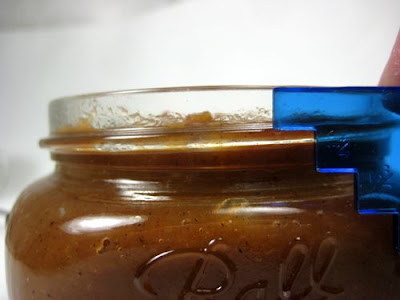
Lids are placed in a pan of hot water (180ºF or 82ºC) to soften the sealing compound.

The lid is seated, centered on the jar and the band is screwed on.
The purpose of the band is to hold the lid down, but not too tightly. Air from the jar needs to escape into the boiling water.
I generally screw down the bands (using two fingers) until resistance stops the band. After which, I give a slight additional 1/4" (6.5mm) twist.

The jars are lowered into the hot water canner. Water temperature is about 180ºF (82.2ºC).
The water level is checked to ensure there is at least 1” (2.54 cm) of water above the jars.
Next, pot is covered and heat turned to high.
When the water comes to a boil, the timer is started (15 minutes). The heat can be lowered as long as the water remains at a boil.
After the 15 minutes are up, the whole canner is removed off the burner (I have an electric stove) and uncovered. Jars are left in the canner for 5 more minutes.

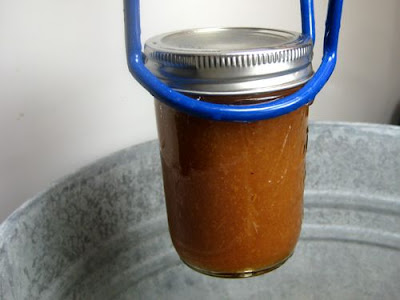
After 5 minutes, the jars are lifted out level.
The temptation is to tilt the jars to drain the water off the top of the lids. Do NOT do that! You don’t want to contents of the jar to running under the seal.
Jars are placed on a dish towel to minimize thermal shock and allowed to cool for 12 to 24 hours.
While the jars are cooling, you may hear a ping or a pop from the lid as it seals. That ping is a good sound. For these three jars, they all pinged within a minute.
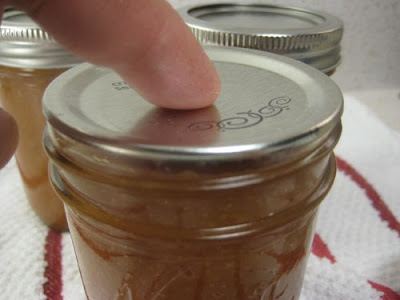
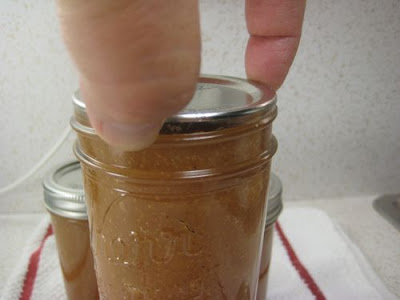
After 24 hours, test the seal. The lid should be bowed down (concave), when you press down the lid should not move or pop up. Also, try lifting the jar by the lid only. The lid should stay on if properly sealed. The final thing is to look at the lid to see if there are any cracks or debris caught between the jar and the lid.
Jar Lift:
Storing – Once the integrity of the lids have been checked, it’s best to store the jars in a cool, dark space. The rings are removed. The rings have done their job of holding down the lids in the boiling water canner and are not needed for storage.
Remember to check the lid before you open a jar.
If the lid has become unsealed during storage or the lid is bulging, throw it out.
If the food has mold, become oddly discolored or has an off odor, throw it out.
The canned apple butter can easily store on a shelf for one year.
Additional Recipes:
Tomatoes are a popular home garden plant. There are seasons when we hit the jackpot with tomatoes. Here are a couple recipes that will help preserve the tomatoes for later in the year.
Coring a tomato
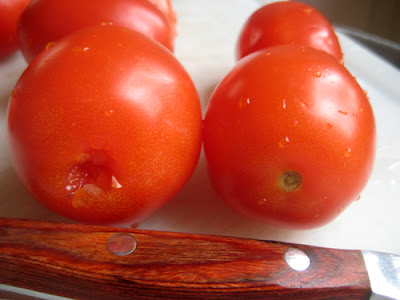
Bake 325 F for an hour or slightly browed.
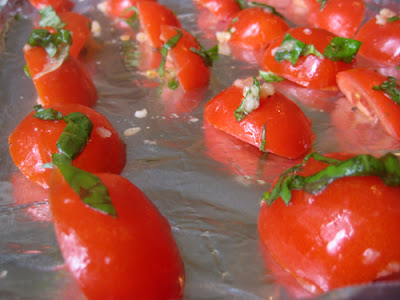
The finished tomatoes can be stored as-cut, chopped or pureed to make a sauce or tomato paste.
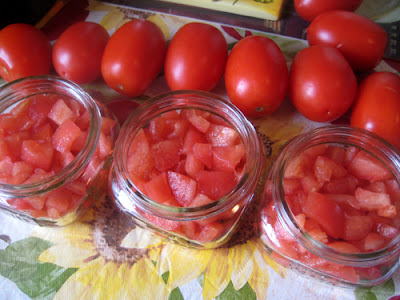
Additional Recipe: Bruschetta in a Jar
Recipe Source: Bernardin Canning Website - http://www.bernardin.ca/pages/recipe_page/51.php?pid=435
* Note: Although other tomato varieties may be used, firm plum tomatoes yield the best results. If using round garden-variety tomatoes, seed tomatoes and drain in colander for 30 minutes then chop.
Headspace: 1/2 “ (1.27 cm)
Processing Time:
20 minutes for altitude of 0 ft (0 m) to 1,000 ft (305 m)
25 minutes for altitude of 1,001 ft (305.1 m) to 3,000 ft (915 m)
30 minutes for altitude of 3,001 ft (916 m) to 6,000 ft (1,830 m)
35 minutes altitudes above 6,000 ft (1,831 m) to 8,000 ft (2,440 m)
1) Place 7 clean half-pint (250 ml) mason jars on a rack in a boiling water canner; cover jars with water and heat to a simmer (180°F/82°C). Set screw bands aside. Heat lids in hot water, not boiling (180°F/82°C). Keep jars and sealing discs hot until ready to use.
2) Wash, seed and chop tomatoes into 1/2 inch (1cm) pieces; measure 9 cups (2250 ml), set aside.
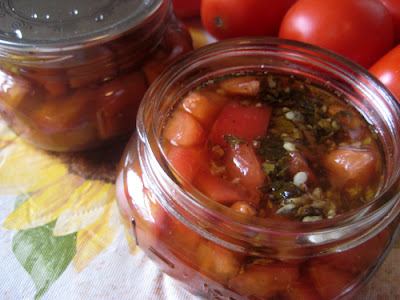
3) Combine garlic, white wine, wine vinegar, balsamic vinegar, water, sugar, basil and oregano in a deep stainless steel saucepan. Bring to a full boil; reduce heat. Stirring occasionally, boil gently, covered, 5 minutes. Remove from heat.
4) Pack tomatoes into a hot jar to within 3/4 inch (2 cm) of top rim. Add hot liquid to cover tomatoes to within 1/2 inch (1 cm) of top rim (headspace). Using nonmetallic utensil, remove air bubbles and adjust headspace, if required, by adding more tomatoes and hot liquid. Wipe jar rim removing any food residue. Centre hot sealing disc on clean jar rim. Screw band down until resistance is met, then increase to fingertip tight. Return filled jar to rack in canner. Repeat for remaining tomatoes and hot liquid.
5) When canner is filled, ensure that all jars are covered by at least one inch (2.5 cm) of water. Cover canner and bring water to full rolling boil before starting to count processing time. At altitudes up to 1000 ft (305 m), process –boil filled jars – 20 minutes.
6) When processing time is complete, remove canner lid, wait 5 minutes, then remove jars without tilting and place them upright on a protected work surface. Cool upright, undisturbed 24 hours; DO NOT RETIGHTEN screw bands.
7) After cooling check jar seals. Sealed discs curve downward and do not move when pressed. Remove screw bands; wipe and dry bands and jars. Store screw bands separately or replace loosely on jars, as desired. Label and store jars in a cool, dark place. For best quality, use home canned foods within one year.
Serving Suggestions:
With boiling water canning, very little oil is used since the oils can weaken the seals on the jar.
For the Bruschetta, olive oil and fresh herbs can be added before serving on top of toasted bread or as a condiment to a dish.

Challenge Summary:
For this challenge, I wanted to pique your interest on the topic of food preservation. The subject may seem daunting, due to my long-winded and geeky explanations, however you will find the process of canning and freezing to be very simple.
I do recommend using tested, research based recipes for boiling water canning. There are many research based websites that offer a lot of information and tested recipes which make the whole food preservation process pretty straightforward.
Additional Information:
USDA Guide to Home Canning: http://www.uga.edu/nchfp/publications/publications_usda.html
For food preservation information, canning guides, recipes and how-to for various foods, I highly recommend The National Center for Home Food Preservation website. http://www.uga.edu/nchfp/index.html
Another website is Ball/Kerr/Bernadin (All owned by Jarden): http://www.homecanning.com/
I used the Canadian version of the website for recipes in metric units.
Approximate pH of Foods: http://foodscience.caes.uga.edu/extension/documents/FDAapproximatepHoffoodslacf-phs.pdf
This pdf contains a larger list of references (WSU Extension C1117E): https://cru84.cahe.wsu.edu/ListItems.aspx?Keyword=C1117E
Hello Daring Cooks! I have the honor of hosting this month's challenge. I’m John from Eat4Fun.
[Yes, that's me! I'm hosting this month's Daring Cooks' Challenge! Woo Hoo!
I wanted to provide a challenge that was unique, provide information that people could use beyond the challenge and a challenge that was vegetarian/vegan friendly. Also, I wanted to use ingredients that were readily available.
I gave two options canning or freezing. Canning requires that you buy jars and lids while, a less expensive option, is freezing where you can find good containers for under $5 for a multi-pack.]
When Lis and Ivonne asked if I would host a challenge, I jumped at the chance. Being a person who enjoys experimenting around with different cooking techniques and learning about new topics, I racked my brain trying to figure out what to present. Chinese cooking? Grilling? Barbecuing? Roasting? Tofu making?
I finally decided on a topic that takes advantage of the time of year where, in the Northern Hemisphere, our gardens and local farms should be harvesting an abundance of fresh fruits and vegetables.
For this month's challenge, I hope to whet your appetite on the vast topic of Food Preservation. Food preservation is a broad subject covering canning, freezing, drying, pickling, fermentation and jam making, but for this challenge the focus will be on freezing and home canning. The main recipe for our challenge will be apple butter. However, a couple additional recipes are provided for a little added variety.
Apple butter is essentially an apple sauce that’s been cooked down with spices to form a thick spread. No butter is used in making apple butter. “Butter” just refers to the spreadable consistency of the final product. Talking with a family friend, she mentioned that apple butter was a way of using the scraps, skins and cores, after making apple sauce. The spices were added to flavor the scraps. Nowadays, recipes use the whole apple, which is what we’ll use for this challenge.
Disclaimer: Since I am an engineering geek, I present a lot of technical information on food preservation. The apple butter is actually a very simple recipe, so please do not be discouraged by the information and jargon used in this write-up.
Why Preserve Foods?
There are many reasons – save the harvest from our garden for later in the year, control the ingredients that go into our food, nostalgia (memories of our parents or grandparents), make gifts, satisfaction of making it yourself… etc. For me, it’s curiosity, controlling what I eat and just the satisfaction of making it myself.
Why foods go bad?
Before we start preserving foods, we need to know why foods spoil.
The two main culprits are
1) The obvious culprit is bacteria, molds and yeast/fungi. I call them “bad bugs.” There are “good bugs” that help with fermentation (yogurt, beer, wine, sourdough breads and pickles), but the bad bugs rots foods, gives foods an off taste and can make us sick.
2) The other culprit is enzymes. Enzymes are molecules that occur naturally in food which encourage chemical changes, some of which are desirable - help ripen fruit by converting starch to sugar, soften fruits or vegetables, or reduce acidity level. Some changes are not desirable, browning when an apple is cut, or the fruit becomes overripe where the flesh becomes soft and mushy.
The other supporting culprits are oxygen and unintentional moisture loss. Fortunately, when we eliminate microorganisms, the rest of the culprits are taken care off at the same time.
Good bugs and bad bugs keep growing and growing?
Bacteria, molds and yeast are living organisms that are present at all times – in the air, on surfaces, and on our food. In order for organisms to survive, they need food, water, oxygen (although some microorganisms can survive without oxygen) and a comfy environment.
A better way to remember food, water, oxygen and comfy place to live is by remembering “FATTOM” or “FAT TOM”. No, FATTOM is not the guitar riff to “Smoke on the Water” [F-A-T, T-T, O-M; F-A-Tee-Tee-O-M]. FAT TOM represents the six conditions microorganisms need to grow/multiply.
FAT TOM is Food, Acidity, Temperature, Time, Oxygen and Moisture.
* Food - Microorganisms, like people, need nutrients. Unfortunately, that means microorganism eat what we eat. Some microorganisms can get by with sugar while other need protein. The foods of concern from a food safety standpoint are low acid, protein rich foods, such as, meat, dairy and egg containing foods.
* Acidity – Acidity is a value between 0 to 14 (known as pH) where values less than 7 are acidic and values above 7 are alkaline. For example, water is generally neutral at pH = 7 while vinegar is acidic with a pH between 2.4 and 3.4. Most foods we eat have a neutral to acidic pH where foods with values 4.6 or higher are considered low acid foods.
* Temperature – Temperatures between 40F (4.4C) to 140F (60C) is considered the Temperature Danger Zone (TDZ) where microorganisms can grow. The optimal temperature for growth is typically between 70F (21C) to 100F (38C). Note: In the USA, the FDA is lowering the higher temperature from 140F to 135F (57C).
- Food Safety Tip: Hot foods should stay hot, above 140F (60C). Cold foods should stay cold, below 40F (4.4 C)
* Time – Given the right conditions and temperatures 40F to 140F, microorganisms start growing. Given enough time, the population will grow rapidly to levels that can make us sick.
- Food Safety Tip: Two hour rule and the Four hour rule.
Foods kept at room temperature (in the TDZ) should be refrigerated before two hours. Foods are to be thrown out after 4 hours in the TDZ. For hot days, for example a 90F (32C) day, the time is cut in half.
- Food Safety Tip: Also, cooling foods in the refrigerator, foods should be cooled within two hours (from 140F (60C) to 70F (21C)). Of course, faster is better. For example, a pot of chili beans can be cooled quickly by pouring into a baking dish where the chili beans are spread out into a thin layer.
* Oxygen – Most microorganisms need air. There are a couple bad bugs that don’t need air to grow where Clostridium botulinum (Botulism), being the most notorious bad bug that prefers a no oxygen environment.
* Moisture – Pure water is the key to life while salt water is less desirable.
How does knowing FAT TOM help us preserve food?
Food preservation works by changing the condition of our food to discourage bad bug growth. Food is what we are trying to save and Time is beyond our control. The remaining factors we can change are Acidity, Temperature, Oxygen and Moisture.
| Brief summary of how each food preservation method works. | ||||
| Preservation Method | Acid | Temperature | Oxygen | Moisture |
| Freezing | Storing foods at 0F (-17.8C) or lower | Airtight packaging | ||
| Boiling Water Canner (high acid foods)/Pressure Canner (low acid ) | Some foods can be acidified using vinegar or lemon juice | Heats foods to kill bad bugs and neutralize enzymes | Jars form a vacuum seal – creates a low oxygen environment | |
| Pickling and Fermentation | Food is acidified by using vinegar or natural bacteria creating lactic acid | Brines (salted water) and sugars reduce fresh water | ||
| Drying | Airtight packaging | Removes up to 90% of the moisture | ||
| Jam and Jellies | Vinegar or Lemon juice, Fruits naturally acidic | Cooking, canning or Freezing | Canning will create a vacuum seal | Sugar reduces water available |
For this daring challenge, we will be focusing on Freezing and Boiling Water Canning.
Freezing:
Freezing refers to storing foods in airtight containers at 0ºF (-17.8ºC) or lower. Freezing does not kill bad bugs. The cold temperature causes the microorganisms to go into hibernation/suspended animation.
Freezing is the easiest food preservation method, especially with modern freezers.
The main pointers for freezing:
1) Freeze foods quickly. Quickly freezing creates smaller ice crystals. Water is a funny substance where water expands when frozen. This means larger ice crystals can puncture cell walls (such as whole berries) so when defrosted you end up with a mushy mass.
2) Try not to freeze too much at once. Typical advice 2 to 3 lbs (1 kg) per cubic foot (28 L) of freezer space.
3) Containers should be airtight and leak proof.
4) Minimize air and gaps in the packaging. This reduces the chance for freezer burn – drying.
5) Label and date the package. Frozen foods tend to look the same over time, especially when a layer of ice has formed.
6) Vegetables can be blanched to deactivate enzymes. Blanching is quick cooking in boiling water for a few minutes and cooled rapidly in ice water.
7) For initial freezing using pliable freezer bags, freeze on a smooth, flat surface to prevent the bag from molding itself to the rack.
Boiling Water Canning:
Boiling water canning sterilizes the food using the temperature of boiling water. The jars form a vacuum seal which creates a low air/oxygen environment.
Important!
The temperature that water boils varies with altitude. At sea level, water boils at 212ºF (100ºC) while at 5,000 ft (1524 m) water boils at 203ºF (95ºC). What this means is canning (processing) times increase with altitude. Fortunately, we don’t need to do the math. Canning recipes include processing times for different altitudes
Boiling water canning is appropriate for high acid foods (foods with pH values lower than 4.6). Typically, fruits are high acid foods while vegetables are low acid. There are a few fruits that are on the border (pH 4.6), such as, tomatoes. However, some borderline pH foods can be acidified by adding vinegar or lemon juice. In home canning, lemon juice (and lime juice) refer to bottled concentrate, unless the recipe calls for fresh. Also, vinegar refers to vinegar with 5% acidity. The percentage strength can be found on the label.
In the USA, home canning uses Mason jars, a thick-walled jar. The lid is a two piece assembly – the lid with a reddish sealing compound and a metal band/ring.
Jars should be inspected before each use – looking for cracks and chips. Washed with detergent dish soap and dried. To reduce thermal shock (hot food cracking a cold jar), the jars should be kept hot. Clean jars can be kept hot by submerging in the boiling water canner or in a dishwasher. Also, a warm oven can be used.
For processing (canning) times less than 10 minutes, the jars need to be sterilized for 10 minutes in boiling water. For altitudes higher than a 1,000 ft (305 meters), an additional minute is added for each 1,000 ft (305 meters) above sea level.
Figure illustrates the jars and lids used in the USA.
The basic steps for using a boiling water canning.
1. Check your jars for chips, cracks and nicks. Wash and preheat your jars.
2. Fill you canner half full with water. Preheat water to 140ºF (60ºC) for raw packing foods or 180ºF (82ºC) for hot packing foods.
3. Fill jars with food prepared according to the recipe, remove bubbles and adjust headspace.
4. Load jars into the canner. It’s important to keep the jars level.
5. Add more hot water, as needed, so the jars are submerged by at least 1 inch (2.54 cm) of water.
6. Cover the canner with the lid and turn the heat to high.
7. Set timer when the water comes to a vigorous boil. You can lower the heat, but the boil must be maintained.
8. When the time is up, turn off the heat and remove the lid. Wait 5 more minutes.
9. Remove jars making sure the jars are level and set on a towel. Allow to cool to room temperature, undisturbed for 12 to 24 hours.
Terminology
Headspace – is the gap between the top of the container to the level of the liquid or food.
For freezing, headspace is important to ensure there is room in the container for the expanding food. For canning, headspace ensures that a proper vacuum seal will form without the food spilling out of the jars while canning.
Raw Pack (canning) – foods are placed in jars raw and, typically, a flavored liquid is added to the jars before processing. Advantages: Food is not cooked twice. Retains shape better. Disadvantages: Uses more jars. Foods may float due to trapped air.
Hot Pack (canning) – foods are cooked before jarring. Advantages: Foods are cooked down so more can be packed into a jar. Less air in food. Disadvantages: Original shape is lost.
Recipe Source:
Reduced Sugar Apple Butter from The National Center for Home Food Preservation – [http://www.uga.edu/nchfp/how/can_02/apple_butter_reduced.html]
Oven Roasted Tomatoes from Susy Hymas, Master Food Preserver
Bruschetta in a Jar from the Bernardin Canning website.
[http://www.bernardin.ca/pages/recipe_page/51.php?pid=435]
Blog-checking lines:
Posting Date: September 14, 2010
Note:
For making apple butter, I do not have a food mill. The first time I made this recipe, I used apples with the stem and blossom end removed. I pressed the soft cooked apples through a mesh strainer. The resulting apple butter yield was barely 3 cups. Therefore, I recommend using peeled and cored apples to yield 5 to 6 cups of apple butter.
Mandatory:
I want all you daring cooks to try canning or freezing one of the recipes presented in the challenge. If you’re leery about making the full recipe, feel free to half a recipe. How much your freeze or can is up to you. My goal is to have you all become comfortable with food preservation.
The apple butter can be frozen or canned while the oven roasted tomatoes are better suited for freezing. The bruschetta is best canned due to the raw tomatoes. Raw tomatoes tend to become soft when frozen and defrosted.
Variations allowed: If you are familiar with home canning and would like to show us your favorite up to date recipe, please feel free to show us your recipe. Remember to reference the source for your recipe.
Preparation time:
- Apple Butter
Preparing Apples: 10 Minutes (if you leave the skin on)
20 Minutes if you peel and core apples
Cooking: 20-30 Minutes to soften apples for mashing + 2 hours to make Apple Butter.
Boiling Water Canner: 40 Minutes
- Roasted Tomatoes
Preparation: 10 Minutes
Cooking: 1 Hour
- Bruschetta in a Jar
Preparation: 15-30 minutes
Canning: 30 Minutes
Equipment required:
Apple Butter
• Knife
• Measuring Cup
• Measuring Spoons
• 8 Quart (about 7½ litres) Sauce Pan or Pot
• Potato Masher
• Storage Container/Containers to hold 5 to 6 cups
Optional:
o Scale
o Vegetable Peeler
o Food Mill
o Freezer Bags/Containers
o Boiling Water Canner
- Pot with Lid
- Rack
- Jars with lids and bands
- Bubble Remover (can use small spatula or plastic knife)
- Wide Mouth Funnel
Roasted Tomatoes
• Knife
• Roasting Pan
• Mixing Bowl
Bruschetta in a Jar
• Knife
• Measuring cups and spoons
• Cutting Board
• Sauce Pan
• Boiling Water Canner + Accessories
• Scale (Optional)
Recipes: Reduced Sugar Apple Butter Recipe
My preference is to use sweet apples (Golden Delicious) so the need for sugar is reduced. However, tart apples (Granny Smith) can be used. It’s a matter of personal preference.
| Recipe: Reduced Sugar Apple Butter | ||||
| Ingredient | U.S. | Metric | Count | Special Instructions |
| Apples | 4lbs* | 1.8 kg | 12 Apples | Cut into eights, stem and blossome end removed |
| Apple Cider | 1 Cup | 240 ml | Optional: Water or Juice | |
| Sucralose/Splenda | 1/2 Cup | 120 ml | Optional: Honey, Agave or Sugar - to taste | |
| Cinnamon, Ground | 1 Tbl | 15 ml | ||
| Allspice, Ground | 1/2 tsp | 3 ml | ||
| Cloves, Ground | 1/4 tsp | 2 ml | ||
Note: * If you used peeled and cored apples. I recommend buying 5 lbs (2.26 kg) of apples.
Gala and Golden Delicious Apples
Directions:
1. Wash apples well and remove stems. Cut apples into quarters or eighths and remove cores.
Note: I ended up peeling the apple at this step.
2. Combine unpeeled apples and cider in 8-quart (about 7 ½ litre) saucepan. Cook slowly and stir occasionally to prevent sticking. Cook until apples are very soft (falling apart).
3. Position a food mill or strainer securely over a large bowl. Press cooked apples with cider through the food mill or strainer to make a pulp. Be sure to collect all the pulp that comes through the food mill or strainer; for example, scrape any pulp clinging under the food mill into the bowl.
Note: Since the apples were peeled, I just mashed in the pot.
4. Combine pulp with Sucralose and spices in an 8-quart (about 7 ½ litre) saucepan. Simmer over low heat, stirring frequently.
Note: A stick blender was used to mix the spices and creates a smoother apple butter. Also, when cooking down the apples, you want to leave the lid ajar or use a splatter screen. This will allow for evaporation. Another trick is to support the lid by laying two wooden spoons across the top of the pot.
5. To test for doneness, spoon a small quantity onto a clean plate; when the butter mounds on the plate without liquid separating around the edge of the butter, it is ready for processing. Another way to test for doneness is to remove a spoonful of the cooked butter on a spoon and hold it away from steam for 2 minutes. It is done if the butter remains mounded on the spoon.
Note: It may be difficult to see, but the sample on the left is the apples sauce from step 3. The apple sauce left a liquid ring while the apple butter did not.
6. Pour contents into desired storage container or multiple containers. I stored my apple butter in 1-cup (250ml) plastic containers with screw on tops. Refrigerate up to 2 weeks, freeze up to a year, and home canning is good for a year.
* The Finished Apple Butter:
Apple Butter is often used as a spread. However, apple butter can also be used as a condiment (pork chops or in marinades) or as an ingredient to an apple quick bread.
* Freezing:
I used a freezer bag where I expelled as much air as possible and minimized the gaps in the bag. Freezer bags work well for storage since they can lay flatter in the freezer than containers.
With a container, you need to ensure you have “headspace”. Headspace is the gap between the food (or liquid level) and the top of the container. Typical, headspace when freezing foods is 1/2 “ (1.27 cm) for straight sided containers. As mentioned previously, water expands when freezing. The headspace allows room for expansion.
Thawing: The best method (Food Safety) is to thaw in the refrigerator for a day.
Cold water, 70ºF (21ºC) or lower, can be used for as quicker way to defrost. The frozen food is submerged under running water. An alternative to running water is to change the water every 30 minutes. If you need an even faster method to defrost and you plan to cook the food immediately, the microwave is another method (of last resort).
* Boiling Water Canning:
For our challenge, apples are high acid foods. Golden delicious apples have an approximate pH of 3.6. Boiling Water Canning is an appropriate method of preserving apple butter.
Apple Butter processing information:
Headspace when canning apple butter is 1/4 “ (0.64 cm)
Processing Time:
15 minutes for altitude of 0 ft (0 m) to 1,000 ft (305 m)
20 minutes for altitude of 1,001 ft (305.1 m) to 6,000 ft (1828.8 m)
25 minutes altitudes above 6,000 ft (1828.8 m)
For boiling water canning, you need a pot that is high enough to cover the jars with at least 1” (2.5 cm) of water. Also, a rack, to prevent thermal shock, is used to keep the jars off the bottom of the pot. Any type of rack will work – a tea towel, a trivet, tying together unused bands… etc. I improvised a rack by tying metal bands to a bamboo sushi mat.
Also, for my pot, I used a large tamale steamer.
Jars are filled using a wide mouth funnel. A plastic bubble remover is run along the sides of the jar, in an up and down motion, to remove air pockets.
The top and side of the jar are wiped down with a damp paper towel.
Headspace is measured to ¼" (6.5mm).
Lids are placed in a pan of hot water (180ºF or 82ºC) to soften the sealing compound.
The lid is seated, centered on the jar and the band is screwed on.
The purpose of the band is to hold the lid down, but not too tightly. Air from the jar needs to escape into the boiling water.
I generally screw down the bands (using two fingers) until resistance stops the band. After which, I give a slight additional 1/4" (6.5mm) twist.
The jars are lowered into the hot water canner. Water temperature is about 180ºF (82.2ºC).
The water level is checked to ensure there is at least 1” (2.54 cm) of water above the jars.
Next, pot is covered and heat turned to high.
When the water comes to a boil, the timer is started (15 minutes). The heat can be lowered as long as the water remains at a boil.
After the 15 minutes are up, the whole canner is removed off the burner (I have an electric stove) and uncovered. Jars are left in the canner for 5 more minutes.
After 5 minutes, the jars are lifted out level.
The temptation is to tilt the jars to drain the water off the top of the lids. Do NOT do that! You don’t want to contents of the jar to running under the seal.
Jars are placed on a dish towel to minimize thermal shock and allowed to cool for 12 to 24 hours.
While the jars are cooling, you may hear a ping or a pop from the lid as it seals. That ping is a good sound. For these three jars, they all pinged within a minute.
After 24 hours, test the seal. The lid should be bowed down (concave), when you press down the lid should not move or pop up. Also, try lifting the jar by the lid only. The lid should stay on if properly sealed. The final thing is to look at the lid to see if there are any cracks or debris caught between the jar and the lid.
Jar Lift:
Storing – Once the integrity of the lids have been checked, it’s best to store the jars in a cool, dark space. The rings are removed. The rings have done their job of holding down the lids in the boiling water canner and are not needed for storage.
Remember to check the lid before you open a jar.
If the lid has become unsealed during storage or the lid is bulging, throw it out.
If the food has mold, become oddly discolored or has an off odor, throw it out.
The canned apple butter can easily store on a shelf for one year.
Additional Recipes:
Tomatoes are a popular home garden plant. There are seasons when we hit the jackpot with tomatoes. Here are a couple recipes that will help preserve the tomatoes for later in the year.
| Recipe: Oven Roasted Tomatoes (for Freezing) | ||||
| Ingredient | U.S. | Metric | Count | Special Instructions |
| Tomatoes | 1lbs | 455 g | 10 to 12 | Cut in half or thirds. Core if needed |
| Fresh Basil | 3 leaves | Chiffonade (Cut into thin strips) | ||
| Fresh Garlic | 2 Cloves | Minced | ||
| Olive Oil | 1 Tbl | 15 ml | ||
| Salt | 1 or 2 pinches | |||
| Cloves, Ground | 1/4 tsp | 2 ml | ||
Coring a tomato
Bake 325 F for an hour or slightly browed.
The finished tomatoes can be stored as-cut, chopped or pureed to make a sauce or tomato paste.
Additional Recipe: Bruschetta in a Jar
Recipe Source: Bernardin Canning Website - http://www.bernardin.ca/pages/recipe_page/51.php?pid=435
| Recipe: Bruschetta in a Jar | ||||
| Ingredient | U.S. | Metric | Count | Special Instructions |
| Plum/Roma Tomatoes * | 3 1/2 lbs | 1.6 Kg | 20 Medium | Wash, seed and chop |
| Fresh Garlic | 5 Cloves | Minced | ||
| Dry White Wine | 1 Cup | 250 ml | ||
| White Wine Vinegar | 1 Cup | 250 ml | ||
| Balsamic Vinegar | 2 Tbl | 30 ml | ||
| Sugar, Granulated | 2 Tbl | 30 ml | ||
| Dried Basil | 2 Tbl | 30 ml | ||
| Dried Oregano | 2 Tbl | 30 ml | ||
* Note: Although other tomato varieties may be used, firm plum tomatoes yield the best results. If using round garden-variety tomatoes, seed tomatoes and drain in colander for 30 minutes then chop.
Headspace: 1/2 “ (1.27 cm)
Processing Time:
20 minutes for altitude of 0 ft (0 m) to 1,000 ft (305 m)
25 minutes for altitude of 1,001 ft (305.1 m) to 3,000 ft (915 m)
30 minutes for altitude of 3,001 ft (916 m) to 6,000 ft (1,830 m)
35 minutes altitudes above 6,000 ft (1,831 m) to 8,000 ft (2,440 m)
1) Place 7 clean half-pint (250 ml) mason jars on a rack in a boiling water canner; cover jars with water and heat to a simmer (180°F/82°C). Set screw bands aside. Heat lids in hot water, not boiling (180°F/82°C). Keep jars and sealing discs hot until ready to use.
2) Wash, seed and chop tomatoes into 1/2 inch (1cm) pieces; measure 9 cups (2250 ml), set aside.
3) Combine garlic, white wine, wine vinegar, balsamic vinegar, water, sugar, basil and oregano in a deep stainless steel saucepan. Bring to a full boil; reduce heat. Stirring occasionally, boil gently, covered, 5 minutes. Remove from heat.
4) Pack tomatoes into a hot jar to within 3/4 inch (2 cm) of top rim. Add hot liquid to cover tomatoes to within 1/2 inch (1 cm) of top rim (headspace). Using nonmetallic utensil, remove air bubbles and adjust headspace, if required, by adding more tomatoes and hot liquid. Wipe jar rim removing any food residue. Centre hot sealing disc on clean jar rim. Screw band down until resistance is met, then increase to fingertip tight. Return filled jar to rack in canner. Repeat for remaining tomatoes and hot liquid.
5) When canner is filled, ensure that all jars are covered by at least one inch (2.5 cm) of water. Cover canner and bring water to full rolling boil before starting to count processing time. At altitudes up to 1000 ft (305 m), process –boil filled jars – 20 minutes.
6) When processing time is complete, remove canner lid, wait 5 minutes, then remove jars without tilting and place them upright on a protected work surface. Cool upright, undisturbed 24 hours; DO NOT RETIGHTEN screw bands.
7) After cooling check jar seals. Sealed discs curve downward and do not move when pressed. Remove screw bands; wipe and dry bands and jars. Store screw bands separately or replace loosely on jars, as desired. Label and store jars in a cool, dark place. For best quality, use home canned foods within one year.
Serving Suggestions:
With boiling water canning, very little oil is used since the oils can weaken the seals on the jar.
For the Bruschetta, olive oil and fresh herbs can be added before serving on top of toasted bread or as a condiment to a dish.
Challenge Summary:
For this challenge, I wanted to pique your interest on the topic of food preservation. The subject may seem daunting, due to my long-winded and geeky explanations, however you will find the process of canning and freezing to be very simple.
I do recommend using tested, research based recipes for boiling water canning. There are many research based websites that offer a lot of information and tested recipes which make the whole food preservation process pretty straightforward.
Additional Information:
USDA Guide to Home Canning: http://www.uga.edu/nchfp/publications/publications_usda.html
For food preservation information, canning guides, recipes and how-to for various foods, I highly recommend The National Center for Home Food Preservation website. http://www.uga.edu/nchfp/index.html
Another website is Ball/Kerr/Bernadin (All owned by Jarden): http://www.homecanning.com/
I used the Canadian version of the website for recipes in metric units.
Approximate pH of Foods: http://foodscience.caes.uga.edu/extension/documents/FDAapproximatepHoffoodslacf-phs.pdf
This pdf contains a larger list of references (WSU Extension C1117E): https://cru84.cahe.wsu.edu/ListItems.aspx?Keyword=C1117E
Subscribe to:
Posts (Atom)
